The 48-Hour Solar Sprint: Build a Safe, Scalable Backup This Weekend
n
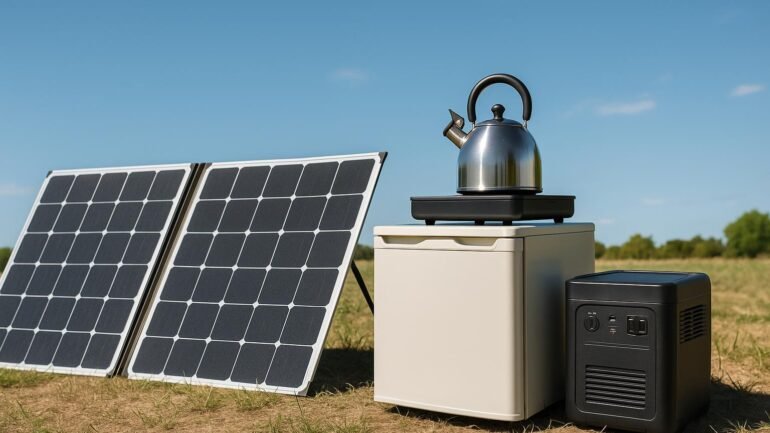
Welcome to the 48-Hour Solar Sprint, a practical time-boxed plan to assemble a reliable backup system for your home or RV. This guide walks you through a safe, modular build you can complete over a weekend, with built in safety checks and a straightforward test routine to prove the setup works. Whether you are trying to lower outage anxiety or plan for off grid trips, the sprint approach keeps scope realistic and scalable for later upgrades.
n
Why a 48-Hour Sprint Works for a DIY Solar Backup
n
The sprint mindset is simple. You define a clear, bite sized goal, gather the components, wire a basic, safe system, test it, and then leave room for future expansion. This approach reduces decision paralysis and helps you manage risk by focusing on critical safety checks first. You also get a working backup quickly, which you can improve as you learn and as conditions change in your home or vehicle.
n
Key benefits include a well defined schedule, a modular design that scales with your needs, and a built in test routine that confirms everything functions together. While this guide uses common 12 or 24 volt configurations, the same principles apply to larger, higher voltage banks as you grow.
n
Planning Your Weekend: What You Need and What to Expect
n
Before you touch a tool, set a simple plan and a realistic goal. A typical weekend project might target a modest energy reserve to handle essential loads such as lighting, a fridge, and communication gear. Start with a plan that fits your space and budget, then expand as you gain confidence. Here is a practical starting checklist.
n
- n
- Target voltage and capacity: choose a system 12 or 24 V bank with total usable capacity in the hundreds to thousands of watt hours, depending on needs.
- Core components: solar panel array, MPPT or PWM charge controller, a battery bank with an appropriate BMS, an inverter, fuses, cabling, and a weatherproof enclosure.
- Space and ventilation: install the battery bank in a cool, ventilated area away from heat sources and water.
- Tools and safety gear: insulated gloves, safety glasses, a multimeter, wire cutters, screwdrivers, and a non-conductive mat.
- Documentation and logs: plan to record voltages, currents and temperatures during tests for future reference.
n
n
n
n
n
n
Part 1 — Gather, Inspect, and Safety First Prep
n
Start by inventorying every component and inspecting for damage. Batteries should show no bulging or leaks; solar panels should be free of cracks; connectors should be clean and corrosion free. Decide on the system voltage and confirm all parts are rated for that voltage. If you use lithium cells, ensure a reliable BMS is in place and that it supports balancing, over current protection and temperature monitoring.
n
Set up a safe workspace with clear ventilation, dry surfaces and a dedicated tool area. Wear PPE when handling batteries and live circuits. Establish a single, reachable shutoff switch that can disconnect the whole system in an emergency. Finally, read the manufacturer specs for each device so you respect current and voltage limits.
n
Part 2 — Build the Modular Battery Bank and Charge Controller Setup
n
Modular construction helps you scale later without rewiring the entire system. Start with one or two 12 V or 24 V blocks assembled in series or parallel as required to reach the target bank voltage. Use proper battery interconnects and bus bars, and protect each string with a fast acting fuse. Connect the strings to a central battery management system and a robust bus to carry the current safely.
n
Install the charge controller next. An MPPT unit is preferred for higher efficiency, especially if your solar array is dynamic with changing sun. Wire the controller to the battery bank with appropriate gauge cable and fusing on the positive lead. If you are grid tied, use a suitable inverter with anti islanding protection and a clear disconnect.
n
Keep the layout neat and accessible. Label all connections and keep a spare fuse and terminal cleaning kit handy. This phase focuses on safety and reliability, not raw power, so take your time to verify each connection with a multimeter before flipping any switches.
n
Part 3 — Wiring, Enclosures, and Safety Precautions
n
DC wiring requires careful sizing. Use cables thick enough to handle peak currents with a comfortable safety margin. For many 12 or 24 V installations, common hobbyist gauges range from awg 8 to awg 4 for main positives, adjusted for distance and expected current. Place fuses as close to the source as practically possible and never bypass protective devices.
n
Mount the battery bank in a ventilated, enclosure that can contain heat and contain any leakage. Position the enclosure off the ground to avoid humidity exposure and consider a small vent or fan for heat dissipation. Grounding DC systems is less critical than in AC circuits, but having a proper bonding path and an isolated enclosure improves safety. Keep all wiring tidy with cable ties and grommets to prevent chafing.
n
Part 4 — Testing, Troubleshooting, and Documentation
n
Testing should proceed in a stepwise manner. Start with static checks: measure the open circuit voltage of the battery bank, verify the solar input voltage, and confirm the charge controller reads correctly. Then perform a no load test by powering a small load such as LED lighting to observe voltage sag and temperature rise. Gradually increase load to its planned limit while monitoring voltage, current and battery temperature.
n
If readings deviate from expected values, recheck all connections, fuses and the BMS settings. Look for resistance, loose terminals or corroded connectors. Document every step, including the date, components, wiring scheme, and results. Having a detailed log helps you troubleshoot future issues and plan expansions more effectively.
n
Scaling Up — Future Expansion and Maintenance
n
One of the biggest advantages of a weekend sprint is the ease of growth. A modular bank lets you add more strings to raise capacity, or upgrade the solar array to capture more energy. When expanding, match new strings to the existing bank voltage and adjust the BMS and charge controller if needed. Always recheck wire sizing and fusing when you add capacity.
n
Maintenance matters as well. Check battery levels weekly, update firmware for BMS and charge controllers, inspect cables for wear, and ensure ventilation remains unobstructed. Keep a simple log of performance and weather conditions to predict when you should add another panel or battery bank.
n
Key Takeaways
n
- n
- Plan the weekend with a clear, achievable goal and safety first.
- Design modularly to enable future expansion without rewiring.
- Test thoroughly and document everything for troubleshooting and growth.
- Follow safety guidelines and respect local electrical codes.
- Choose components from reputable brands and keep protective devices in place.
n
n
n
n
n
n
With the sprint complete, you have a safe, scalable solar backup that can provide essential power during outages and on the road. Treat this as a living system that you will refine and grow over time, not a one off project. Always keep safety as the top priority and consult a licensed electrician for larger, more complex installations.
n
Conclusion
n
By following this 48 hour sprint, you gain a practical, dependable backup that fits your space and budget while remaining expandable. The weekend approach keeps scope manageable, encourages safe practices, and delivers a working system you can rely on today and improve tomorrow. Happy building and safe powering.