A Quick Hands-On Session to Size and Wire a Tiny Backup
In this time-boxed lab, you’ll size a compact backup system for a small off-grid setup, wire the essentials, and perform basic safety checks — all in under 60 minutes. It’s a practical, hands-on exercise for DIY solar enthusiasts who want a fast, repeatable process you can replicate on future projects.
What you’ll do: define loads, select a battery, pick a controller and fusing, wire a simple bus, and verify operation with a quick test. Calculations are kept simple and scalable for larger setups later.
1) Define your essential loads and runtime
Begin by listing the devices you want to keep powered during an outage. A tiny backup might run a 60 W fridge and a 40 W charging device for a couple of hours. Example: 60 W + 40 W for 2 h = 200 Wh. At 12 V, that’s about 200 Wh / 12 V ≈ 16.7 Ah. Add 20–30% headroom for inefficiencies and future loads, landing around 20–25 Ah of usable capacity.
Note on chemistry matters: for LiFePO4 you can safely discharge to 80–90% DoD, while lead-acid packs typically require around 50% DoD for longevity. This changes your usable capacity calculations.
2) Pick a battery and usable capacity
For a tiny backup, a 24–30 Ah LiFePO4 battery is a clean, long-lasting choice. If you’re using AGM or flooded lead-acid, plan for a deeper DoD and a larger nominal capacity (roughly 40–60 Ah) to achieve similar usable energy. This keeps runtime in the target range without overstressing the system.
You can read more about battery chemistry to help pick the right storage in this battery chemistry guide.
3) Choose a small charge controller and protective fusing
Pick a compact controller rated for your panel size (commonly 10–15 A for tiny backups). Install a properly rated inline fuse on the positive lead close to the battery. Use wire gauges sized for the maximum current and run length (for example, 14–16 AWG for short, low-current runs; larger gauge if you have longer runs or higher current).
4) Wiring basics for a tiny backup
Keep the wiring simple: connect the panel to the controller, controller to the battery, and the loads to a small fused distribution bus on the battery side. Use a dedicated high-current fuse near the battery, keep negative returns common, and minimize run lengths to reduce voltage drop. A simple bus bar or distribution block helps tidy the setup.
Internal references to planning tools can help you refine the approach: Critical-Loads First for prioritizing essentials; the battery chemistry guide for storage choices; and RV Solar 101 for sizing basics in real-world contexts.
5) Quick safety checks
Before powering anything, inspect all connections for tightness, secure fuse placement, and correct polarity. Use insulated tools, wear eye protection, and keep dry. Never work on live terminals with metal jewelry. Ventilate battery compartments if you’re using flooded or gel chemistry.
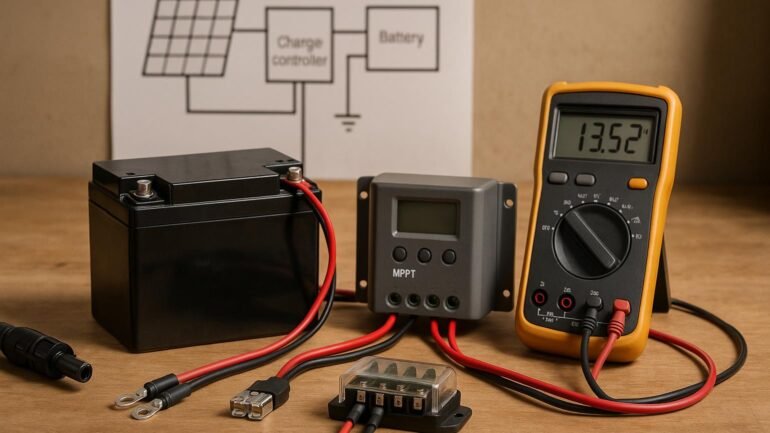
6) Quick test and validation
With the system connected, measure the battery voltage and observe the panel current when loads are applied. Turn on each device one-by-one and verify voltage stays within a healthy range (typically 12.6–13.2 V open-circuit and staying above 12 V under load). If voltage sags or heat appears, pause and recheck connections and wiring gauge.
Want a weekend-scale version? See The 48-Hour Solar Sprint for a safe, scalable backup build you can extend later. The 48-Hour Solar Sprint.