Winter realities for solar power: embracing low sun and cold temps
If you are exploring DIY solar power basics, a winter-friendly weekend project can be practical and rewarding. Shorter daylight hours, cold temperatures, and snow pose real challenges, but with a clear plan you can assemble a compact, reliable system for a home or RV that makes the most of every sunbeam—even on overcast days. This guide walks you through a practical, winter-focused weekend build: sizing, equipment choices, safety, testing, and quick optimization tips. It is designed for beginners who want a real-world plan they can complete in a weekend and scale later.
Winter realities demand a practical approach. Solar panels produce less power when temperatures drop, not because the sun disappears, but because panel efficiency and battery chemistry respond to cold. Snow and frost can block exposure or redirect energy while you clear them. And the sun sits lower in the sky, making tilt and orientation more important than in summer. With these realities in mind, you will size the system, choose cold-tolerant components, and emphasize safety and monitoring throughout the build.
Understanding the winter challenge in plain language
- Sunlight is weaker and days are shorter — plan for fewer peak sun hours per day.
- Cold temperatures can reduce battery capacity and charging performance.
- Snow and frost affect panel exposure and airflow, potentially reducing output until cleared.
- Wind, humidity, and freeze-thaw cycles can stress wiring and enclosures if not properly kept dry and sealed.
These realities don’t mean you can’t power a home or an RV during winter. They do mean you should size a little larger than a warm-season setup, use components that tolerate cold, and maintain a simple routine for keeping panels clean and batteries healthy.
Sizing your DIY solar power basics for a weekend project
For a weekend build, you want a kit that covers essential loads without overcomplicating the install. Start with a simple planning approach you can tailor as you go:
- Determine your daily energy use in winter in kilowatt-hours (kWh).
- Estimate available winter sun hours (often 2–4 peak sun hours, depending on location and tilt).
- Choose a battery bank with usable capacity to support evening and cloudy-day needs.
- Select a charger and inverter that can handle your peak loads without overworking the system.
Practical steps in the planning phase:
- List essential loads for winter months: refrigeration, lighting, a furnace or space heater used carefully, water pump, and electronics. Don’t forget charging devices and Wi-Fi gear if you rely on them.
- Convert those loads to daily kWh. For example, a small fridge may use 0.5–1.5 kWh/day; lighting might add 0.2–0.5 kWh/day per room; a laptop or phone charging is modest but adds up over a week.
- Decide your target autonomy: two days of power without sun, or primarily daytime power with batteries for evening. Weekend builds typically target at least one day of autonomy for reliability.
- Convert your plan into a panel and battery spec: total watts of panels needed = daily kWh / (sun hours × system efficiency). A practical rule of thumb is to assume 60–80% system efficiency to cover controller losses and temperature effects, and then oversize a bit for cold days.
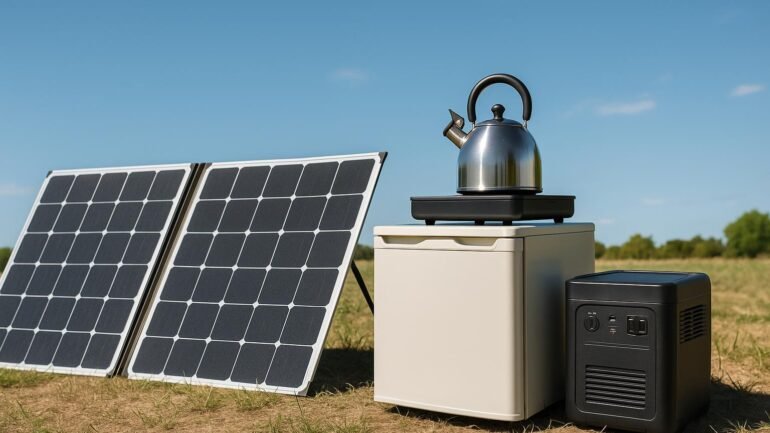
For many households and RV setups, starting with a 100–200 watt panel array and a 100–200 amp-hour smart battery bank is a reasonable weekend starter. If you are powering HVAC or a heated space, you will want more capacity and perhaps a supplemental heating strategy. Remember you can always add more panels or a larger battery bank later, but it is much harder to change core components after the weekend.
Equipment choices for low-sun conditions
Choosing the right gear matters twice as much in winter. Prioritize components that maximize low-light efficiency, tolerate cold, and simplify safe operation.
- Panels: Favor monocrystalline panels for higher efficiency in low light. If space is tight, high-efficiency panels deliver more watts per square foot, a big plus in winter where every watt counts.
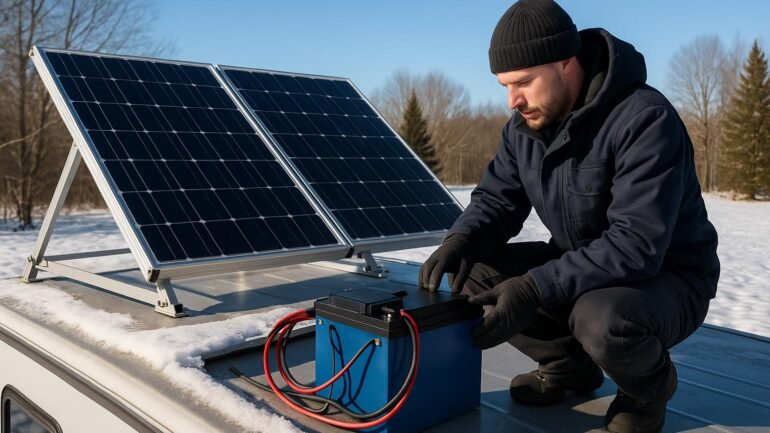
- Mounting and tilt: Tilt the panels to capture the sun when it sits lower in the sky. A tilt angle at or above your latitude helps improve winter capture. If you can, a simple adjustable mount lets you adjust seasonally; at minimum, aim for a steeper incline than summer setups.
- Charge controller: An MPPT controller shines in winter. It converts more of the panel voltage to charging voltage, especially when temperatures swing and panel output is lower.
- Battery chemistry: LiFePO4 offers excellent cold-weather performance and deeper discharge with longer life. If sticking with lead-acid, opt for a high-quality deep-cycle AGM or gel, and remember they lose capacity in the cold. Keep batteries in a temperature-controlled space when possible.
- Inverter: A pure sine wave inverter handles sensitive electronics better and reduces startup issues with motors. For a weekend build, a 1000–1500W inverter often covers basic loads for a small home or RV setup.
- Wiring and safety gear: Use appropriately rated cables with proper fuses/breakers, anti-spark connectors for quick isolation, and weather-sealed enclosures. In winter, moisture and condensation are common, so ensure tight seals and venting where needed.
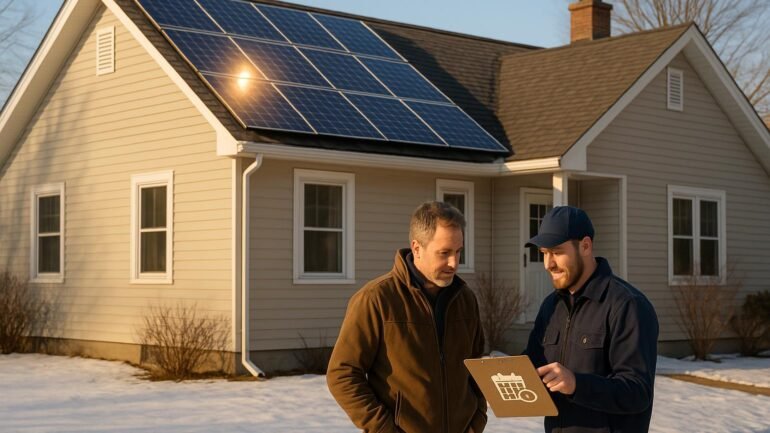
Also plan for practical safety upgrades. A simple DC disconnect, an accessible AC main switch, and a clear labeling scheme help you power down quickly if you smell heat or see a fault. If you are not comfortable with electrical work, consider a basic pre-wired kit with clear instructions or consult a professional for the final hookup.
Safety first: a weekend build you can trust
Safety is non-negotiable, especially in cold, snowy environments where slips, frostbite, and electrical hazards are real risks.
- Work with power off: disconnect every live circuit before handling wiring or panels.
- Keep panels dry and paths clear: snow and ice can create slip hazards and short circuits if water infiltrates connectors.
- Use weather-rated enclosures and grommets to seal cables entering buildings or vehicles.
- Check ratings: all components should be rated for outdoor use in freezing temperatures and humidity.
- Fire safety: have a fire extinguisher rated for electrical fires on hand and never bypass safety devices to save a few minutes.
- Personal safety: wear insulated gloves, eye protection, and non-slip footwear when climbing or working on panels.
Keep a simple, written safety checklist as part of your weekend build so you don’t skip critical steps in the rush to finish. And remember: if you are unsure about wiring or insulation, pause and re-check or seek professional help. DIY solar power basics are about making a safe, repeatable system you understand and maintain, not about rushing through risky steps.
Step-by-step plan: from planning to testing
Below is a practical weekend workflow that aligns with the DIY solar power basics mindset. It breaks the project into achievable milestones you can complete in two days with decent daylight and a clear workspace.
- Day 1 morning: finalize loads and sizing
- List essential winter loads and their wattage and hours of use.
- Estimate daily kWh and set a target daily production goal for panels.
- Day 1 afternoon: gather and meter components
- Unbox panels, controller, inverter, and battery bank.
- Check cable lengths and fuse sizes; plan routing from panels to controller to battery to inverter.
- Day 2 morning: install and wire
- Mount panels on a sturdy surface with a winter-optimized tilt.
- Run wiring through weatherproof channels, install fuses and a safety disconnect.
- Connect battery bank with proper polarity and temperature considerations.
- Day 2 afternoon: test and tune
- Power up the system with no load; verify voltages at battery and panel terminals.
- Connect the inverter and run a small test load (LED lights, charger, small fridge if within spec).
- Review performance in daylight: log panel current, voltage, and estimated charge rate.
Document all connections, take photos for future reference, and label every component for easy maintenance. If anything reads outside safe parameters, rewind and re-check the connections before applying loads.
Quick optimization tips for winter days
Even after the weekend build, a few small practices can maximize output during winter days without a lot of extra effort.
- Optimize tilt and orientation seasonally. In winter, tilt panels more steeply to catch low sun angles. If you can, adjust a couple of times per season.
- Keep panels snow-free. Use a soft brush or roof rake to remove snow without scratching panels. Never use metal tools that could damage surfaces or wiring.
- Store energy smartly. Use loads during daylight to minimize reliance on stored energy. Charge devices in daylight and run critical loads after sundown only when necessary.
- Temperature-aware charging. Ensure your charge controller has a temperature sensor and set charging voltages appropriate for cold temperatures to avoid over- or undercharging.
- Battery health matters. If you anticipate several cloudy days, consider a modestly larger battery bank or a portable generator backup to cover peak demand without stressing the system.
These tweaks can noticeably improve performance without complicating the system. They align with the DIY solar power basics mindset: practical, scalable steps you can do now and build on later.
Maintenance and future upgrades
A winter solar setup thrives with steady maintenance and thoughtful upgrades over time. A few routines keep your system reliable for years of use.
- Seasonal inspection: check seals, mounting hardware, and connections for corrosion or wear after winter storms.
- Panel cleanliness: gently wash panels if there’s visible dirt or dust. Snow should slide off naturally; if it sticks, clear it carefully to avoid damaging coatings.
- Battery upkeep: test battery state of health every few months and monitor temperature. In cold environments, consider insulation or a small heater pad for critical batteries if it’s safe and appropriate for your setup.
- Software and firmware: keep MPPT controller firmware and inverter software up to date to maximize efficiency and safety features.
- Capacity planning: track your daily kWh production and consumption. If you notice regular deficits in winter, plan a future upgrade by adding another panel or expanding the battery bank.
Future upgrades don’t have to be expensive or complex. Start with a modest panel addition or a higher-capacity battery that fits in your existing enclosure. The goal is to preserve the DIY solar power basics spirit: incremental improvements that improve reliability and give you confidence in any season.
Testing and optimization: final checks
Before you rely on the system, run a thorough test under real winter conditions. A robust test helps confirm you have sized correctly and wired safely.
- Open-circuit voltage test: measure panel Voc at cool temps to ensure it is within the controller’s range.
- Charging test: observe battery voltage rising as sun hits the panels; ensure the controller smoothly regulates charging without excessive heat or buzzing.
- Load test: run a representative load (lights, fridge, charger) while monitoring battery SOC and inverter temperature.
- Weather contingency: map a 2–3 day forecast and verify that the system can support essential loads with limited sun or during snow days.
If any readings are off, revisit connections and check for loose wires, corroded terminals, or improper gauge wiring. Document the adjustments you make so future you isn’t left guessing when you revisit the project a season later.
Final thoughts: embracing DIY solar power basics for winter
Winter does not have to mean sacrificing energy independence. With a focused plan, winter-ready gear, and safety-first discipline, a weekend build can deliver meaningful solar power for a home or an RV. By sizing thoughtfully, selecting winter-ready components, prioritizing safety, and maintaining the system over time, you’ll have a reliable platform you can expand as needs grow. This is the essence of the DIY solar power basics mindset: practical, scalable, and repeatable steps that keep you powered through winter and beyond.