Why a compact shed-side power system is ideal for outdoor workshops and tiny studios
n
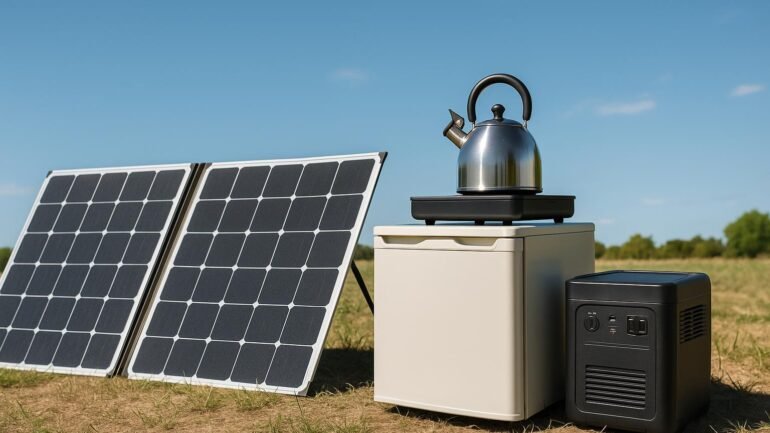
A compact shed-side power system delivers reliable electricity right where you work. It protects tools, lighting, and small machines from winter conditions while keeping cables and clutter to a minimum. If your workspace sits beside a shed, a creek, or a small studio cabin, this approach minimizes runs and simplifies setup—so you can keep building, drafting, or repairing even when temperatures drop.
n
The big win in winter is predictable performance. Cold nights, drafty doors, and longer sessions increase power needs for heaters, lighting, and charging gear. A purpose-built shed-side system stays near your work area, reducing voltage drop and letting you rely on steady power with less fuss. Key benefits include:
n
- n
- Compact footprint with a big impact on usable space
- Short, low-loss power runs to tools and lighting
- Weather-aware design with cold-compatible enclosures and components
- Easy expansion: add panels or additional batteries as needed
n
n
n
n
n
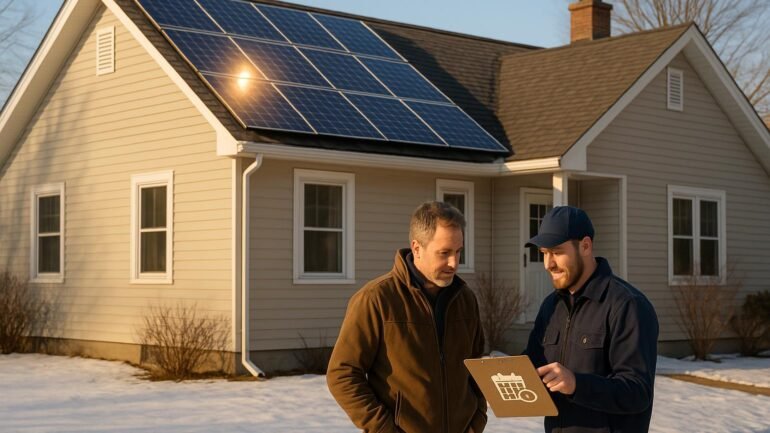
With a clear plan focused on cold-weather performance, space efficiency, and safe installation, you’ll be ready to power your winter sessions with confidence. The sections below cover three pillars: battery selection for cold temperatures, space-efficient solar and storage, and safe installation practices to protect gear in chilly months.
nn
Core components for winter-proof operation
nn
Battery selection for cold temperatures
n
Choosing the right chemistry, temperature strategy, and protection is the single most important step for a winter-ready compact shed power system. Cold weather slows chemistry, reduces capacity, and can complicate charging. The goal is reliable operation without overheating or shutdown during deep freezes.
n
- n
- Chemistry that performs in the cold: LiFePO4 (lithium iron phosphate) offers solid voltage, broad operating range, and good thermal stability in winter. AGM and flooded lead-acid can work but lose capacity quickly as temperatures drop and require more careful charging.
- Protection and BMS: A robust battery management system with low-temperature charging control helps prevent damage when temperatures dip. Look for cell balancing, over/under voltage protection, temperature monitoring, and automatic warm-up or cut-off.
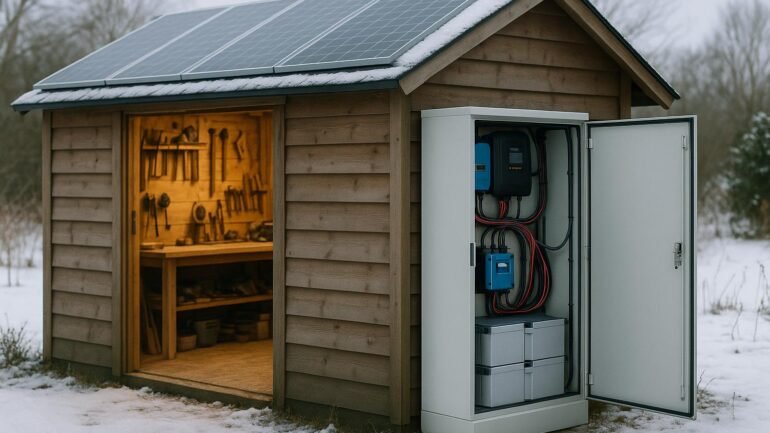
- Enclosure and insulation: Weatherproof, insulated housing stabilizes battery temperature. For freezing nights, consider a thermally insulated cabinet or a small, safe heater designed for battery enclosures.
- Heating strategies: Passive insulation is often enough; for extended cold snaps you can use low-watt heaters controlled by the BMS. The aim is to minimize energy draw while keeping cells in their optimal range.
- Sizing and modularity: Start with a practical capacity aligned to typical loads (lighting, tools, chargers). If expansion is on the horizon, design with modular packs that nest in a compact footprint and add capacity without major rewiring.
n
n
n
n
n
nn
Choosing solar panels, charge controllers, and inverters for limited space
n
Solar hardware should be compact, durable, and capable of winter harvest. Prioritize high-efficiency panels, space-efficient mounting, and a controller that makes the most of limited sun.
n
- n
- Panels and mounting: Roof-integrated or wall-mounted panels maximize winter sun at low angles. Consider flexible or foldable panels only if mounting is secure and weatherproof.
- Power electronics: MPPT charge controllers maximize harvest in low insolation. A compact inverter (or a pure sine-wave model sized for your loads) converts DC to usable AC for tools and lighting.
- Modularity and wiring: Use modular storage for easy upgrades and tidy wiring. Favor a simple layout that scales with added panels or battery packs.
n
n
n
nn
Sizing and load planning for common shed tools and lighting
n
Plan around typical warm-up and standby loads. Start with a conservative baseline and scale up as needed to cover winter-specific peaks (work lights, charging, occasional power tools).
nn
Example load scenarios and daily energy calculations
n
- n
- Lighting: LED shop lights (4–8 A at 12–24 V DC equivalents) for 6–8 hours per day
- Charging: cordless tools, batteries, and devices (0.5–1.5 A averages, higher during peak)
- Tools: small power tools (drills, sanders) with brief usage bursts
n
n
n
n
Use a simple daily watt-hour estimate and then add a buffer (20–40%) for winter variability. A LiFePO4 pack with ~20–40% headroom and 150–300 W of solar can support a compact shed workshop in winter when combined with efficient LEDs and modest tool loads.
nn
Safe installation and winter maintenance
nn
Enclosure, wiring safety, and temperature management
n
Winter reliability hinges on safe access, weatherproofing, and user-friendly operation. Adhere to electrical safety norms, weatherproofing, and routine maintenance.
nn
- n
- Weatherproof enclosures: Use NEMA/IP-rated cabinets for all battery and electrical components. Seals prevent moisture and corrosion.
- GFCI protection: Install outdoors or shed-adjacent outlets with GFCI protection for damp or icy conditions.
- Wiring and cable management: Use conduit or protective sheathing for exterior runs. Keep wiring tidy to resist wear from wind, ice, or foot traffic.
- Grounding and bonding: Follow local codes to ground the system; a proper path reduces shock risk and protects equipment.
- Ventilation and heat: Batteries and inverters generate heat; provide cabinet ventilation without inviting moisture. If using a heater, choose a thermostat-controlled unit to avoid overheat.
- Insulation and weatherproofing: Insulate the wall adjacent to the system and seal doors/windows to reduce drafts around the cabinet.
- Security: Use tamper-resistant hardware and lockable enclosures to deter theft during idle periods.
- Maintenance routines: Regularly inspect connections, seals, and battery SOC. Do seasonal checks before winter and recalibrate as needed.
n
n
n
n
n
n
n
n
nn
User-friendly operation and maintenance
n
- n
- Clear labeling: Label breakers, outlets, and disconnects for quick identification in gloves.
- Startup sequence: Document a simple winter startup routine for solar charging, battery conditioning, and load testing.
- Diagnostics: Use status indicators or a small display showing SOC, charging current, and health.
n
n
n
nn
Quick-start design: a practical all-in-one layout
n
To start without overhauling your setup, follow this practical path:
n
- n
- Define your loads: List essential devices and estimate continuous wattage and peak demand.
- Size the system modestly: Choose LiFePO4 with 20–40% headroom, a compact MPPT controller, and 150–300 W of solar for a compact footprint.
- Choose a weatherproof cabinet: Ensure space for the battery, BMS, and wiring, plus ventilation.
- Plan the layout: Mount panels to maximize winter sun, place the cabinet near the workshop door, and run protected conduit between.
- Test safely: Run a winter-cycle test of charging, discharging, and startup sequences before the cold season.
n
n
n
n
n
nn
A simple maintenance mindset pays off. Winter weather tests patience and equipment, but with a well-planned compact shed power system you’ll enjoy steady lighting and reliable tool performance throughout the season.
nn
Conclusion
n
In short, a compact shed power system is ideal for outdoor workshops and tiny studios that demand dependable winter performance. By focusing on cold-weather battery selection, space-efficient solar and storage, and careful installation, you can keep your tools ready and lighting bright—right at the shed side. This approach minimizes clutter and scales with your growing project list.