Thinking about solar and battery storage but worried about the price? This starter guide helps you build a compact, hybrid system that backs up your fridge, lights, and internet without breaking the bank. Whether you’re at home or camping in an RV, you can size sensibly, choose chemistry wisely, and pick inverter/charger combos that fit a modest budget. We’ll cover sizing basics, lithium vs lead-acid decisions, inverter options, and the nuts-and-bolts of permits and codes. Real-world cost ranges and a practical shopping checklist help you move from idea to a testable setup in a weekend.
Sizing a small hybrid system for a fridge, lights, and internet
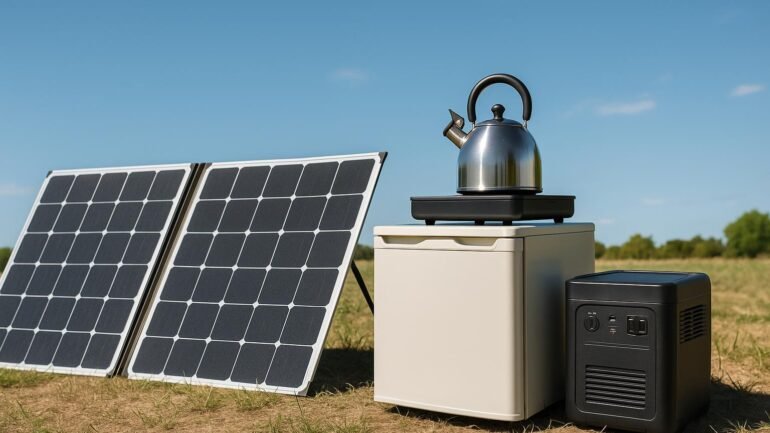
Start by listing your essential loads and rough usage. For many households trying a starter setup, the core loads are a compact fridge or freezer, LED lights, a Wi-Fi router/modem, and perhaps a laptop or a small TV. A simple way to estimate:
- Fridge: 0.6–1.2 kWh per day (modern energy-efficient models are toward the lower end).
- LED lighting: 0.1–0.3 kWh per day depending on the number of lights and hours.
- Internet gear and small electronics: 0.05–0.2 kWh per day.
Total daily energy: roughly 0.8–1.7 kWh for a compact, minimally loaded setup. If you want 1–2 days of autonomy (backup power when the sun isn’t shining), multiply that daily usage by the number of days you want. A ballpark rule for a starter kit is to plan for about 2–3 kWh of usable energy storage per day of expected use and then add a small buffer for safety.
Translation to hardware: it’s easier to plan around the battery bank capacity and solar input. For example, if you target about 2 kWh of daily use and 1 day of autonomy with Li‑ion at 80–90% depth of discharge, a 2.5–4 kWh nominal battery bank translates to roughly 200–350 Ah at 12 V. If you prefer lead-acid and are comfortable with more weight and maintenance, you’ll need more capacity to achieve the same usable energy.
Lithium vs Lead-Acid: which battery chemistry fits your budget
Battery choice is one of the biggest levers for price and performance. Here are the practical trade-offs for DIY builders.
- Lithium (often LiFePO4) batteries: Higher usable capacity per dollar over time due to high DoD (often 80–90%), longer cycle life (2,000–5,000+ cycles), lighter weight, no regular equalization, and memory-free operation. They’re easier to scale and install in tighter spaces. Costs are higher upfront (roughly $0.6–$1.0 per watt-hour equivalent for a complete pack at the cell level, but does vary with brand).
- Lead-acid (including AGM and flooded): Much lower upfront cost and plenty of DIY-friendly options. Heavier, lower usable capacity (often 50% DoD for safe long life), shorter cycle life, and more maintenance for flooded types. Best for tight budgets if you’re willing to manage weight and maintenance.
Practical takeaway: for a starter system that’s easy to scale and space-conscious, many DIY builders pick LiFePO4 batteries for the long-term value. If price is the only constraint and you’re comfortable with heavier packs and regular checks, AGM lead-acid can be a stepping-stone.
Inverter, charger, and how to run a usable system
The inverter converts your stored DC energy to AC to run common devices like a fridge. The charger keeps your battery bank fueled when the sun shines. Here’s how to choose them without overspending.
- A pure sine wave inverter is essential for the fridge and most electronics. For a compact setup, 600–1000 watts continuous output is a good starting point; look for surge capability to handle fridge startup spikes (1000–2000 watts surge is common).
- 12 V systems are common for DIY kits. If you plan to add more storage later, a 24 V or 48 V system reduces current and heat in wiring, but requires higher-capacity components and often a different wiring approach.
- If you’re not using an all-in-one inverter/charger, you’ll want an MPPT charge controller to extract more energy from your solar panels. In budget builds, a 10–20 A MPPT or modest PWM controller may suffice, but MPPT will improve performance in real-world sun.
- Solar panel sizing: Start with 2×100 W panels for a small setup or 1×200–400 W if you’re tight on space and want faster charging on sunny days. Panels are modular—add more later as needed.
Overall, a simple, budget-friendly package might include a 600–800 W pure sine inverter, a 20–40 A MPPT controller, and 2×100 W/200 W solar panels. As you expand, you can add more panels and a larger battery bank while keeping the same inverter and wiring approach.
Wiring, safety, and code: permitting basics
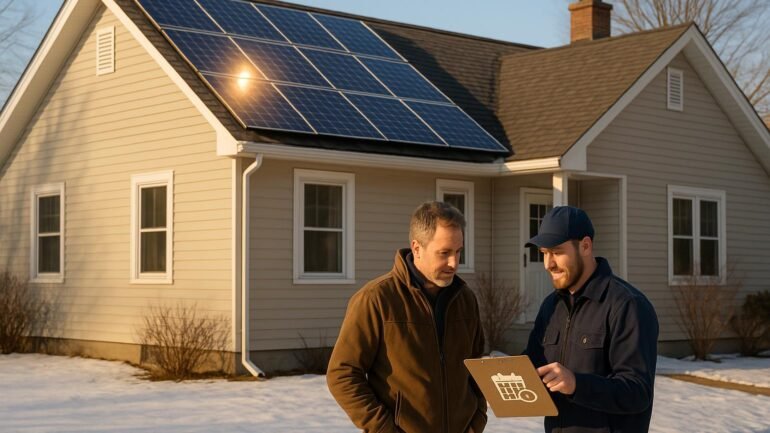
DIY enthusiasts can build off-grid or emergency backup systems, but a few safety and code basics are important. Always check local rules, and when in doubt, consult a licensed electrician for critical connections.
- In most jurisdictions, any grid-tied or large off-grid system that connects to your home electrical system requires a permit and inspection. Off-grid standalone kits at small scales may not require permits, but follow local guidance.
- Respect NEC or your local electrical code for conductor sizing, fusing, grounding, and enclosure labeling. Use properly rated breakers or fuses and keep DC wiring separate from AC wiring as appropriate.
- Li‑ion cells or lead-acid batteries can off-gas or overheat. Place them in a ventilated, dry, well‑sealed battery compartment away from living spaces and heat sources.
- Use fuses, proper gauge wires, and strain-relief for all cables. If you’re not comfortable doing live wiring, hire a professional for the final connections or an easier stand-alone system that doesn’t require panel-to-house tie‑ins.
Costs, budgets, and a practical shopping checklist
To make the numbers concrete, here are realistic ranges for a starter DIY solar + battery kit. Prices vary by brand, region, and whether you choose new or refurbished components.
Budget-friendly starter (roughly $1,000–$1,600):
- 12 V, 100 Ah lead-acid or similar: $120–$230
- 600–800 W pure sine inverter: $100–$180
- 2x 100 W solar panels: $150–$350 each
- MPPT or PWM charge controller: $40–$120
- Cables, fuses, connectors, battery box: $60–$120
- Basic monitoring or battery management: $0–$50 (depending on kit)
Mid-range starter (roughly $2,000–$3,000):
- LiFePO4 battery bank around 150–200 Ah at 12 V (or equivalent 24/48 V pack): $600–$1,000
- 3–4 panels total (300–600 W): $500–$1,200
- 600–1000 W inverter with built‑in or external charger: $150–$350
- MPPT charger and necessary wiring: $100–$250
Shopping checklist (start here):
- Load estimate and target daily kWh
- Battery type and capacity (Ah at your system voltage)
- Inverter size and surge rating
- Charge controller type (MPPT) and current rating
- Solar panel wattage and mounting options
- Quality cabling, connectors, and safety fuses
- Battery enclosure with ventilation and spill containment
- Safety gear and basic monitoring (voltage, current, SOC)
Putting it all together: a simple install plan
Here’s a practical, step-by-step plan to move from idea to an operational starter system in a weekend or two.
- Define loads and time of use. Sketch a simple diagram of where devices will live and which outlets will be powered by the system.
- Choose chemistry and size. Pick LiFePO4 for long life if budget allows; otherwise a sealed lead-acid kit can be started quickly.
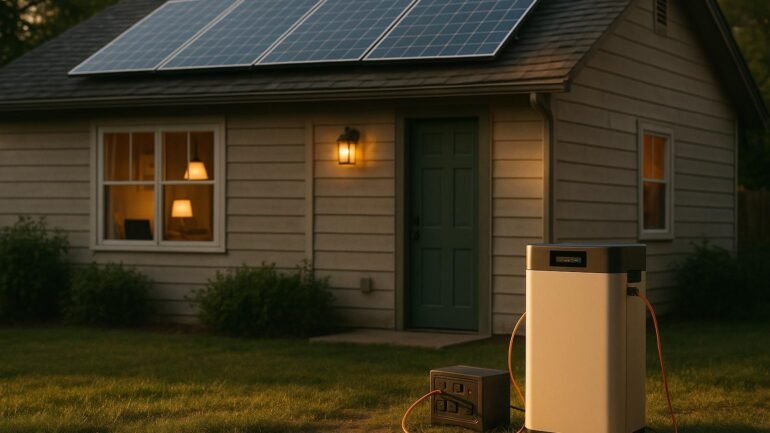
- Assemble components. Mount panels on a carport, shed roof, or ground rack. Route DC cabling to a central location and install fuses. Install the battery bank in a ventilated enclosure.
- Connect the charge controller to panels, then to the battery bank. Check polarity and insulation before powering anything.
- Install the inverter and wire the essential AC outlets. Leave room for expansion and ensure proper grounding and bonding per local codes.
- Test slowly. Start with a small load, verify voltage and SOC, then add loads one by one. Check for heat on cables and devices.
- Document and label. Keep a simple log of component specs, wiring diagrams, and safety notes so future tweaks are easier.
Key Takeaways
- Start by sizing around your actual loads (fridge, lights, internet) and plan for a reasonable autonomy window rather than chasing the largest possible bank.
- Lithium batteries offer higher usable capacity and longer life, but at a higher upfront cost; lead-acid is cheaper upfront but heavier and less forgiving.
- A pure sine inverter and MPPT charge controller are key for reliable operation of essential loads; size them for your peak and startup surges.
- Permitting and code compliance matter—check local rules, get professional advice for ties to the house, and respect safe battery placement.