Building your own solar generator is a practical, budget friendly way to secure portable power for camping, an RV setup, tailgating, or a blackout backup. This guide walks you through a complete, reliable DIY system that uses a LiFePO4 battery, an MPPT charge controller, a 200W solar panel, essential fuses, and a pure sine inverter. All components are chosen to keep the total near six hundred dollars, while still delivering solid performance in real world use. You will learn what to buy, how to wire things together, safety tips, and how to expand the setup as your needs grow.
What you will build and why this setup fits your needs
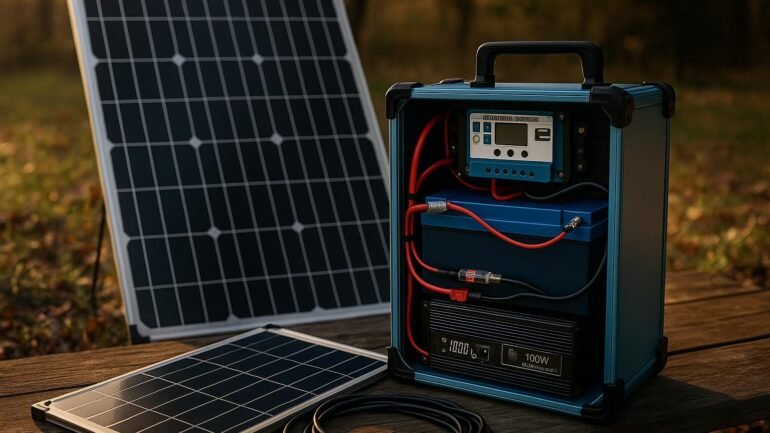
The core idea is simple: store energy in a LiFePO4 battery bank, charge it from a 200W solar panel via an MPPT controller, and deliver clean AC power through a pure sine inverter. The system is compact enough to carry on a small cart or in a sturdy box, yet capable enough to run a laptop, small fridge, blender, or lighting for a weekend outdoors. LiFePO4 chemistry provides long cycle life and good thermal stability, making it a sensible choice for DIY power systems. The MPPT controller maximizes charging efficiency in less-than-ideal sun, and the inverter supplies a stable AC waveform suitable for sensitive electronics. We also cover expansion paths so you can grow capacity for longer trips or longer outages without throwing away the entire kit.
Core components and why they matter
- LiFePO4 battery a 12V nominal pack is common for portable systems. A 60Ah capacity is a practical sweet spot for around 720Wh usable energy, depending on depth of discharge and BMS protections. Look for built in BMS, good cell balance, and a robust enclosure for transport.
- MPPT charge controller a 20A MPPT works well with a 200W panel and a 12V battery. MPPT controllers optimize voltage and current to maximize charging efficiency, especially in morning and late afternoon sun when panel voltage tends to be higher than the battery voltage.
- 200W solar panel a compact, efficient panel option for quick charging in sunny conditions. Mono crystalline panels tend to offer higher efficiency and better space utilization, which matters for a portable kit.
- Pure sine inverter a compact 500W continuous rating provides clean power for a wide range of devices. A pure sine wave ensures laptop power supplies, chargers, and small appliances run smoothly and safely.
- Fuses and wiring a main battery fuse (typically around 50A for a 500W inverter on a 12V system) protects the DC wiring. A separate PV side fuse (around 10–15A) protects the solar input. Use appropriately rated cables to handle peak currents and minimize voltage drop.
- Enclosure and wiring hardware a ventilated box or lightweight case keeps the components together, while proper bus bars or junction blocks keep connections neat and safe. Keep the panel and battery connections short to reduce losses and heat.
Step-by-step build plan
- Plan your layout decide where each component will live, ensuring good ventilation for the battery, a clear path for wiring, and a stable mounting position for the panel.
- Prepare the LiFePO4 battery install the battery in its enclosure, connect the built in BMS, and fuse the positive lead near the battery terminal. If your pack doesn’t include a fuse, install a single main fuse between the battery and the inverter (commonly 50A for a 500W inverter).
- Install the MPPT controller mount the MPPT in a ventilated spot, away from moisture. Connect the solar panel to the PV input via a PV side fuse (around 10–15A). Then connect the MPPT DC output to the battery positive through the main battery fuse, and the DC return to the battery negative.
- Wire the inverter connect the inverter’s DC input to the battery through the main fuse, keeping heavy gauge cables to minimize voltage drop. The inverter’s AC output should go to a heavy duty outlet strip or a dedicated AC load panel for easy plugging in loads.
- Finalize the safety features add a fuse block for all high current lines, use ring terminals, and secure all connections. Label positive and negative runs to reduce confusion during future maintenance.
- enclosure and weather sealing place components in a sturdy, ventilated enclosure or rugged box. Use foam or padding to reduce vibration during transport and add optional weather sealing if you expect rain or high humidity.
- Initial test with the system open, check voltage at the battery, MPPT input and inverter output. Then perform a controlled load test by plugging in a light load (LED lamp or small charger) and verifying safe operation and temperature rise stays within limits.
Wiring diagrams and safety tips
Clear wiring is essential for safety and reliability. The following diagram describes a straightforward path from the solar panel to the battery and the inverter. Always disconnect the battery before making changes to the wiring and wear protective equipment when working with high current lines.
Panel (+) ---- PV fuse ---- MPPT input
Panel (-) ---- MPPT input

MPPT output (+) ---- Main 50A fuse ---- Battery (+)
MPPT output (-) ---- Battery (-)

Battery (+) ---- Inverter (+)
Battery (-) ---- Inverter (-)

Inverter AC output ---- Load
- Use a proper battery fuse close to the battery terminal on the positive lead.
- Keep PV wiring separate from AC wiring to minimize noise and interference.
- Always verify polarity before connecting the MPPT and inverter.
- Choose cable gauges that handle the expected current with an ample safety margin to keep voltage drop low.
- Ventilate the battery chamber and avoid exposing the battery to moisture or direct water spray.
Expandability for camping, tailgating, and blackout backup
The beauty of a modular, under 600 kit is that you can expand without reworking the entire system. If you want more capacity for longer trips or more reliability during outages, consider the following upgrades in logical steps:
- Add more solar input two smaller panels can be wired in parallel to a MPPT controller rated for higher current, or you can upgrade to a larger MPPT with higher current rating. If you stay with a 20–30A MPPT, plan for about 150–200W of panel per 10A of controller capacity for reliable performance.
- Increase storage expand by adding more LiFePO4 packs in parallel to raise capacity while keeping the system at 12V. Parallel connection increases total Ah while maintaining the voltage. Stay within the safe operating area of the BMS and keep pack temperatures in check.
- Upgrade to higher voltage if you plan larger loads, you can reconfigure toward 24V or 48V with appropriate controllers and wiring. This reduces current for the same power, which can lower wire losses but requires compatible hardware and safety practices.
- Rugged enclosure and mobility use a wheeled cart or a sturdy case with a pull handle for camping and tailgating. Add weatherproof seals and a padding system to protect components during transport.
Testing, performance expectations, and maintenance
Testing is the best way to validate that your DIY solar generator behaves as expected. Here are practical tests and what to expect in normal conditions.
- with the system powered off, verify the LiFePO4 pack rests around 12.6–13.0 volts. If it sits much lower, charge it first before load testing.
- in bright sun, the panel open circuit voltage should be around 18–22V, with Isc roughly 8–10A for a typical 200W panel. The MPPT should push current to the battery up to the controller rating.
- monitor the battery voltage as the MPPT charges. A healthy LiFePO4 pack will rise toward 14.4V during absorption, then settle to 13.2–13.4V float once charging ends.
- connect a known load such as a 60–100W appliance and observe runtime. With a 60Ah 12V pack you can expect around 5–7 hours of runtime at 100W depending on inverter efficiency and battery state of charge.
- if you add another panel or extra battery, re-check the MPPT’s ability to handle the larger current and ensure fuse ratings are updated accordingly.
Performance expectations for a typical setup with a 60Ah LiFePO4 pack and a 200W panel are as follows: under good sun you can expect a full recharge in 4–6 hours midday, with steady daily use you may cycle the system through several nights of light loads. Real world results depend on sun, temperature, and load type. Treat this kit as a reliable camp and backup power source rather than a full home power system, and you will stay satisfied with its performance.
Key Takeaways
- Keep the total budget under 600 by selecting a modest 200W panel, a 60Ah LiFePO4 pack, and a 500W pure sine inverter.
- Choose an MPPT controller with ample headroom for expansion and higher efficiency in cloudy conditions.
- Prioritize safety with a main battery fuse, a PV input fuse, proper wiring gauge, and a ventilated enclosure.
- Plan for expandability by adding panels or more LiFePO4 capacity in parallel, and upgrade the MPPT as needed.
- Test the system with real loads to understand runtime, charging rates, and heat during operation.
Conclusion: Building a DIY solar generator under six hundred dollars is absolutely feasible with careful component selection and thoughtful wiring. By choosing LiFePO4 chemistry, an MPPT controller, a 200W panel, and a compact pure sine inverter, you gain practical portable power for camping, tailgating, RV outings, and reliable blackout backup. When you understand the basics of charging, discharging, and safe wiring, expanding the system later becomes a straightforward upgrade rather than a complete rebuild.