Panel cleaning is one of the most overlooked aspects of solar system maintenance. Dirty panels can reduce efficiency by 15-25%, making regular cleaning essential for maximum power output. Whether you’re maintaining rooftop arrays or RV installations, proper cleaning techniques ensure your investment delivers optimal performance.
Many DIY solar enthusiasts skip regular maintenance, thinking rain provides adequate cleaning. However, dust, bird droppings, pollen, and road grime create stubborn films that water alone cannot remove. Furthermore, improper cleaning methods can scratch expensive photovoltaic surfaces or void manufacturer warranties.
This comprehensive guide covers everything from basic cleaning tools to advanced techniques for both stationary and mobile installations. Additionally, we’ll explore safe cleaning schedules and common mistakes that damage panels. By following these proven methods, you’ll maintain peak system performance year-round.
Essential Tools for Safe Panel Cleaning
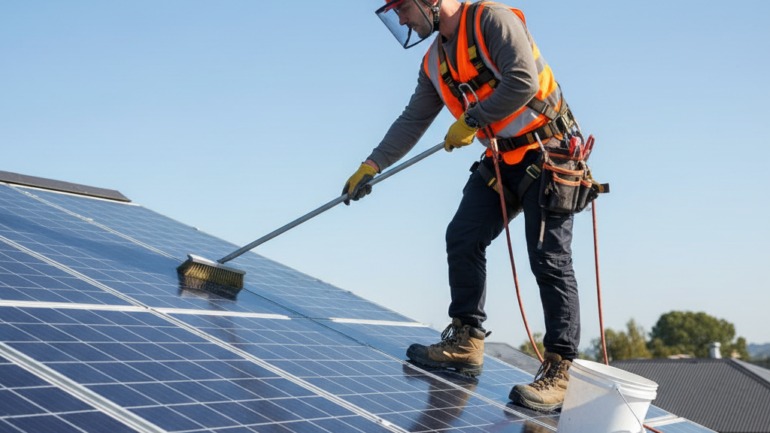
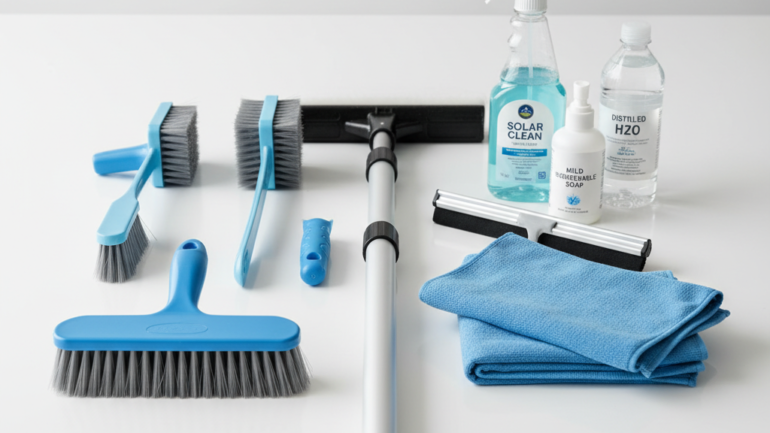
Selecting the right cleaning tools prevents scratches while ensuring thorough dirt removal. Soft-bristled brushes, squeegees, and microfiber cloths form the foundation of effective panel cleaning equipment. Moreover, extension poles allow safe cleaning without dangerous ladder work on rooftop installations.
A basic cleaning kit should include a telescoping brush with soft bristles, distilled water, mild soap, and lint-free cloths. Avoid abrasive materials like steel wool or rough sponges that can permanently damage anti-reflective coatings. Similarly, harsh chemicals and high-pressure washers can crack tempered glass surfaces.
For RV installations, portable spray bottles and collapsible brushes save storage space during travel. Battery-powered pumps provide consistent water pressure without connecting to external sources. These compact solutions make routine maintenance possible anywhere you park.
Safe Cleaning Products and Solutions
Most panels require only distilled water and mild dish soap for effective cleaning. Commercial solar cleaning solutions offer enhanced dirt removal but cost significantly more than homemade alternatives. However, specialized products may be necessary for heavy contamination or mineral deposits.
Mix one tablespoon of gentle dish soap per gallon of distilled water for basic cleaning solution. Alternatively, white vinegar removes mineral buildup without damaging panel surfaces. Never use ammonia-based cleaners, bleach, or automotive products that can deteriorate protective coatings.
Distilled water prevents mineral spots that tap water often leaves behind. These spots can create hot spots that reduce panel efficiency over time. Therefore, investing in distilled water pays dividends through improved long-term performance.
Step-by-Step Cleaning Process
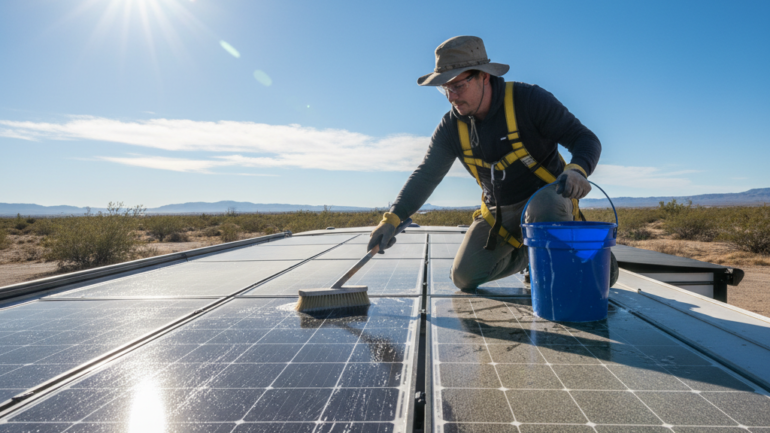
Begin cleaning during cooler morning or evening hours when panels aren’t hot from direct sunlight. Hot surfaces can crack when exposed to cool water, potentially causing expensive damage. Additionally, soap and water dry quickly on hot panels, leaving streaks and residue.
First, rinse panels with clean water to remove loose dirt and debris. Next, apply cleaning solution using a soft brush in gentle circular motions. Work systematically across each panel, paying attention to heavily soiled areas around mounting hardware.
Rinse thoroughly with distilled water after scrubbing each section. Subsequently, use a squeegee or microfiber cloth to remove excess water and prevent spotting. Finally, inspect panels for damage, loose connections, or areas requiring additional attention.
Special Techniques for Stubborn Contaminants
Bird droppings require immediate attention as they can permanently stain panel surfaces. Soak affected areas with cleaning solution for several minutes before gentle scrubbing. Consequently, quick action prevents acidic waste from etching glass surfaces.
Tree sap and sticky residues need plastic scrapers rather than metal tools that scratch glass. Work slowly and apply cleaning solution frequently to soften stubborn materials. Patience prevents damage that rushed cleaning often causes.
In areas with hard water, mineral deposits may require white vinegar solutions. Mix equal parts distilled water and white vinegar for effective mineral removal. However, test this solution on a small area first to ensure compatibility with your specific panels.
Optimal Cleaning Frequency and Scheduling
Geographic location, weather patterns, and environmental factors determine ideal cleaning schedules. Desert installations may require monthly cleaning due to dust accumulation, while coastal areas face salt spray challenges. Therefore, observe your local conditions to develop appropriate maintenance timing.
Most home installations benefit from quarterly cleaning, with additional sessions after major storms or dust events. RV systems typically need more frequent attention due to road dust and varied environmental exposures. Moreover, monitoring system output helps identify when cleaning becomes necessary.
Seasonal considerations also affect cleaning frequency and techniques. Spring brings pollen and tree debris, while fall introduces leaf buildup and preparation for winter. Winter cleaning focuses on snow removal and ice prevention rather than deep cleaning.
Smart monitoring systems can alert you when panel efficiency drops below normal levels. This data-driven approach optimizes cleaning timing while preventing unnecessary maintenance. Consequently, you’ll maintain peak performance without wasting time on premature cleaning.
Common Cleaning Mistakes to Avoid
Using high-pressure washers ranks among the most damaging mistakes DIY installers make. Excessive water pressure can force moisture into electrical connections or crack panel glass. Instead, rely on gentle water flow and proper cleaning techniques for safe maintenance.
Cleaning hot panels during midday sun creates thermal shock that can shatter tempered glass. Additionally, soap solutions dry too quickly on hot surfaces, leaving streaky residues. Plan cleaning sessions during cooler parts of the day for best results.
Walking directly on panels damages cells and creates micro-cracks that reduce efficiency over time. Always clean from ladders, scaffolding, or ground-based extension tools. Furthermore, proper safety equipment prevents both personal injury and system damage.
Neglecting safety shutoffs before cleaning creates electrocution risks when water contacts electrical components. Solar safety protocols must be followed every time you perform maintenance work. Turn off DC disconnects and inverters before beginning any cleaning procedures.
RV-Specific Panel Cleaning Considerations
RV panel cleaning presents unique challenges including limited water supplies, storage constraints, and varied terrain access. Portable cleaning kits must balance effectiveness with space efficiency. Additionally, road vibration can loosen mounting hardware that requires inspection during cleaning.
Flexible panels common on RVs need gentler handling than rigid glass panels. Avoid excessive pressure that can damage thin-film surfaces or underlying substrates. Furthermore, curved installations require specialized brushes that conform to panel shapes.
Water conservation becomes critical during boondocking adventures when fresh water supplies are limited. Waterless cleaning products or minimal-water techniques help maintain panels without depleting precious reserves. However, these methods may not achieve the same results as thorough water-based cleaning.
Consider investing in properly designed RV solar systems that facilitate easier maintenance access. Well-planned installations include service spaces and tilt mechanisms that simplify routine cleaning tasks.
Monitoring Performance After Cleaning
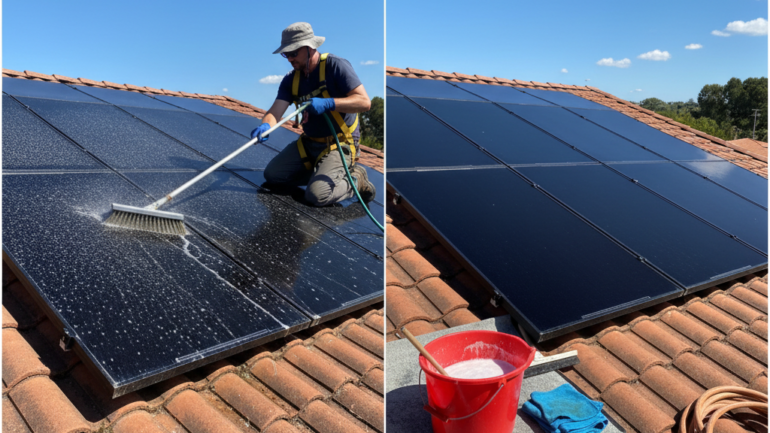
Track system output before and after cleaning to quantify maintenance benefits. Clean panels should show noticeable power increases, especially during peak sun hours. Document these improvements to optimize future cleaning schedules and techniques.
Use monitoring apps or basic multimeters to measure panel voltage and current output. Compare readings taken at similar times under comparable weather conditions. Consistent monitoring helps identify panels requiring more frequent attention or potential hardware issues.
Photography provides valuable documentation of panel condition over time. Take pictures before and after cleaning sessions to track contamination patterns and cleaning effectiveness. This visual record helps refine techniques and identify problem areas requiring special attention.
Understanding real sun hours and system performance helps differentiate between efficiency losses from dirt versus normal seasonal variations. This knowledge prevents unnecessary cleaning while ensuring optimal system operation throughout the year.
Conclusion: Maintaining Peak Solar Performance
Regular panel cleaning represents one of the simplest yet most effective ways to maximize solar system returns. Proper techniques, appropriate tools, and consistent scheduling ensure long-term efficiency without risking expensive damage. Moreover, DIY maintenance saves money while building valuable system knowledge.
Start with basic cleaning supplies and develop techniques suited to your specific installation and environment. Monitor results to refine your approach and identify optimal maintenance intervals. Remember that prevention through regular cleaning costs far less than replacing damaged panels or accepting reduced efficiency.
Whether maintaining rooftop arrays or RV installations, these proven cleaning methods will keep your solar investment performing at peak capacity. Clean panels not only generate more power but also demonstrate the professional care that maximizes component longevity and system reliability.