Clean solar panels are essential for maintaining maximum power output in your DIY solar setup. Whether you have panels on your home roof or RV, proper panel cleaning techniques can boost efficiency by 10-25%. Many DIY solar enthusiasts overlook this simple maintenance task. However, regular cleaning is one of the most cost-effective ways to protect your solar investment.
Dirty panels don’t just look bad—they significantly reduce power generation. Dust, bird droppings, leaves, and other debris create shadows that block sunlight from reaching solar cells. Even a small amount of dirt can cause disproportionate power losses. Additionally, some stains can permanently damage panel surfaces if left untreated.
This comprehensive guide covers everything you need to know about DIY solar maintenance. We’ll explore the best cleaning tools, safe techniques, and optimal schedules for both home and RV installations. Furthermore, you’ll learn to avoid common mistakes that could damage your panels or void warranties.
Understanding Solar Panel Cleaning Basics
Solar panels require gentle care to maintain their delicate photovoltaic surfaces. The glass coating on most panels is designed to be self-cleaning to some extent. Rain naturally washes away light dust and debris. However, stubborn materials like bird droppings, tree sap, or heavy dust require manual intervention.
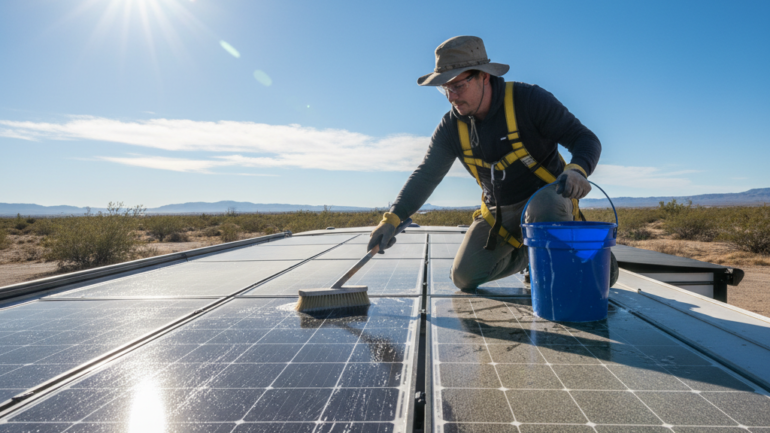
Most manufacturers recommend cleaning panels every 3-6 months, depending on your environment. Desert areas or locations with heavy bird activity may require monthly cleaning. Conversely, areas with frequent rain might only need bi-annual maintenance. Moreover, RV panels often collect more debris due to constant travel through different environments.
The key principle is using gentle pressure and appropriate cleaning solutions. Harsh chemicals or abrasive materials can scratch the panel surface permanently. Subsequently, these scratches create hot spots that reduce efficiency and potentially cause long-term damage. Therefore, understanding proper techniques is crucial before starting any cleaning project.
Essential Tools for Panel Cleaning
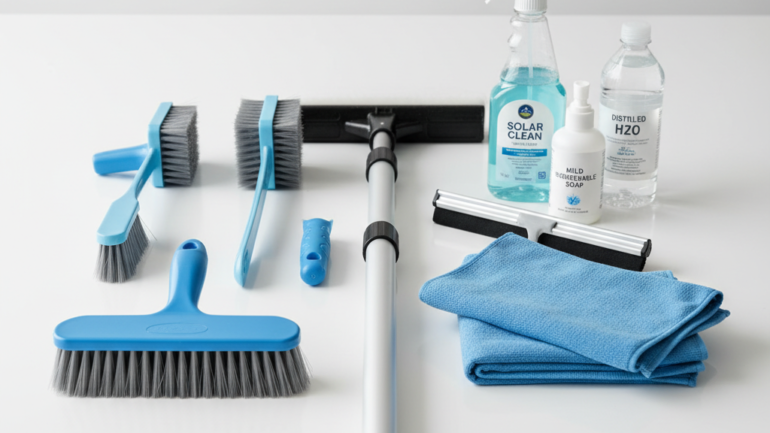
Successful panel cleaning starts with having the right equipment. A basic cleaning kit should include a soft-bristled brush, squeegee, and microfiber cloths. Additionally, you’ll need a garden hose with adjustable pressure settings and appropriate cleaning solution.
For hard-to-reach home installations, consider investing in an extension pole system. These telescoping tools allow ground-level cleaning without dangerous roof access. Similarly, RV owners should have a sturdy step stool or portable ladder for safe panel access. Safety equipment like non-slip shoes and gloves are equally important.
Avoid using household cleaning supplies not designed for solar panels. Window cleaners containing ammonia can damage anti-reflective coatings over time. Instead, use specialized solar panel cleaners or simple dish soap solutions. Furthermore, never use pressure washers, as high-pressure water can damage panel seals and electrical connections.
Recommended Cleaning Solutions
The safest cleaning approach uses plain water for most situations. Deionized or distilled water works best because it doesn’t leave mineral deposits. For stubborn dirt, add a small amount of mild dish soap to your water. This creates a gentle cleaning solution that effectively removes most debris without damaging surfaces.
Commercial solar panel cleaners offer convenience and are formulated specifically for photovoltaic surfaces. These products typically contain surfactants that help water sheet off panels more effectively. However, they’re not always necessary for routine maintenance. In fact, many professional installers rely primarily on soap and water solutions.
Never use abrasive cleaners, bleach, or petroleum-based products on solar panels. These chemicals can permanently damage anti-reflective coatings and reduce panel efficiency. Similarly, avoid cleaners with high pH levels that might corrode panel frames. When in doubt, consult your panel manufacturer’s cleaning recommendations.
Step-by-Step Cleaning Process
Begin your panel cleaning process during cooler parts of the day, preferably early morning or evening. Hot panels can cause water to evaporate quickly, leaving soap residue and water spots. Additionally, working on hot surfaces is uncomfortable and potentially dangerous.
Start by turning off your solar system at the main disconnect switch for safety. While panels are generally safe to clean while operating, eliminating electrical hazards is always wise. Next, remove loose debris like leaves or twigs by hand before applying water. This prevents scratching the panel surface during cleaning.
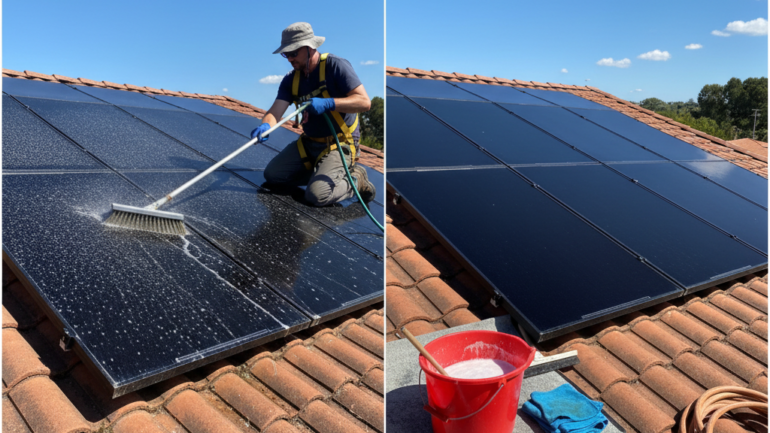
Rinse panels thoroughly with low-pressure water to remove surface dirt. Work from top to bottom, allowing gravity to help carry away debris. Subsequently, apply your cleaning solution using a soft brush or cloth in gentle circular motions. Finally, rinse thoroughly and squeegee or air-dry to prevent water spots.
Safety Considerations for Home Installations
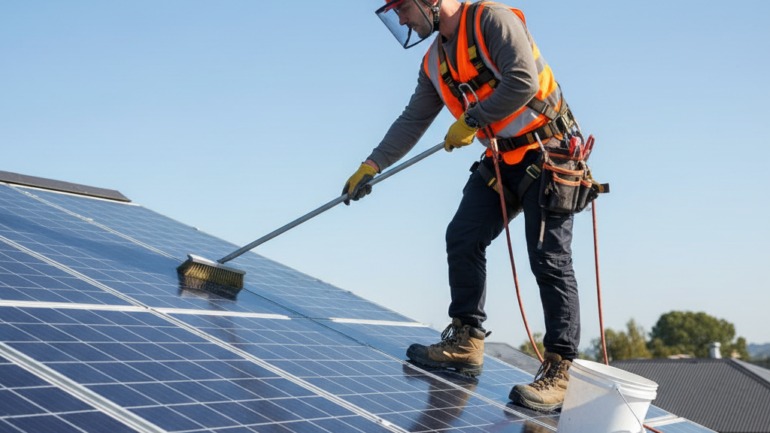
Roof-mounted panels present unique safety challenges that require careful planning. Never attempt cleaning on wet, icy, or windy days when traction is compromised. Furthermore, always inform someone of your cleaning schedule and expected completion time. Having a spotter on the ground provides additional safety and assistance.
Use proper ladder safety techniques, including the 4:1 rule for ladder placement. Ensure the ladder extends at least three feet above the roof line for safe mounting. Additionally, consider using roof anchor points or safety harnesses for steep or high installations. Solar safety for DIYers provides comprehensive guidelines for working safely around solar equipment.
Professional cleaning services might be worthwhile for challenging installations. Complex roof layouts, steep pitches, or multi-story homes increase risk significantly. Moreover, professional cleaners have specialized equipment and insurance coverage. Therefore, evaluate your situation honestly before attempting DIY cleaning on difficult installations.
RV Solar Panel Maintenance
RV panels face unique challenges due to constant exposure to road debris and varying weather conditions. Highway travel exposes panels to insects, tar, and dust that rarely affect stationary home installations. Consequently, RV panels often require more frequent cleaning than residential systems.
Inspect RV panels weekly during travel season for damage or excessive debris buildup. Look for cracks, loose mounting hardware, or damaged electrical connections while cleaning. Additionally, check that panels remain securely attached after rough road conditions. Early detection of problems prevents costly repairs and maintains system reliability.
Consider the environment when parking your RV for extended periods. Avoid parking under trees that drop sap, berries, or excessive leaves onto panels. Similarly, be mindful of bird roosting areas that could lead to frequent soiling. Strategic parking choices can significantly reduce cleaning frequency and panel maintenance requirements.
Dealing with Stubborn Stains
Bird droppings and tree sap require special attention during cleaning. These substances can harden and bond to panel surfaces if left untreated. Soak affected areas with warm, soapy water for several minutes before gentle scrubbing. Never scrape hardened materials with metal tools that could scratch the glass.
For extremely stubborn stains, consider using a plastic scraper or credit card edge. Work carefully to avoid applying excessive pressure that might crack the panel surface. Additionally, specialized stain removers designed for solar panels can dissolve difficult deposits safely. Always test new products on a small, inconspicuous area first.
Water spots from mineral-rich water sources can accumulate over time. These spots may appear as white, chalky deposits on the panel surface. Regular cleaning with distilled water helps prevent mineral buildup. However, existing spots may require gentle acidic cleaners specifically formulated for solar applications.
Seasonal Cleaning Considerations
Different seasons present unique challenges for solar panel cleaning maintenance. Spring typically brings pollen, flowering debris, and increased bird activity. This season often requires more frequent cleaning to maintain optimal performance. Plan for weekly inspections during peak pollen season in your area.
Summer heat makes cleaning more challenging but debris removal more critical. High temperatures can bake contaminants onto panel surfaces, making removal difficult. Early morning cleaning sessions help avoid working on hot surfaces. Additionally, summer storms may deposit dust or debris that requires immediate attention.
Fall brings leaves, seeds, and preparation for winter weather. Clear panels of organic debris that could decompose and stain surfaces. Moreover, ensure panels are clean before potential snow coverage. Winter-proofing your starter solar system covers comprehensive seasonal preparation strategies.
Winter Maintenance Challenges
Snow and ice present the biggest seasonal cleaning challenges for solar panels. Light snow often slides off panels naturally due to their smooth surface. However, heavy accumulation may require careful removal to restore power generation. Never use metal tools or hot water that could crack cold panel glass.
A soft push broom with an extension handle safely removes most snow accumulation. Work from bottom to top, allowing snow to fall away from the panel surface. Additionally, ensure safe footing and clear escape routes when working around snow-covered equipment. Ice formation requires patience, as forced removal risks panel damage.
Consider your system’s winter performance expectations when planning maintenance. Panels can generate significant power even with light snow coverage. Therefore, aggressive snow removal isn’t always necessary for adequate system performance. Focus on safety over maximum snow removal in challenging conditions.
Monitoring Panel Performance
Regular performance monitoring helps determine cleaning effectiveness and schedule optimization. Most modern inverters provide production data through smartphone apps or web interfaces. Compare daily, weekly, and monthly output to identify when cleaning becomes necessary. Sudden performance drops often indicate debris accumulation.
Keep a simple maintenance log noting cleaning dates, weather conditions, and performance improvements. This historical data helps establish optimal cleaning schedules for your specific location. Furthermore, documentation may be required for warranty claims or insurance purposes. Efficiency first: cutting your solar needs before you buy explains how clean panels maximize your overall system ROI.
Visual inspection remains important despite electronic monitoring capabilities. Some issues like micro-cracks or hot spots aren’t immediately apparent in production data. Moreover, regular hands-on maintenance helps you become familiar with your system’s normal operation. This familiarity makes identifying problems much easier over time.
Common Cleaning Mistakes to Avoid
Many DIY solar owners make cleaning mistakes that reduce effectiveness or damage equipment. Using abrasive materials like steel wool or harsh chemicals tops the list of damaging practices. These materials permanently scratch protective coatings and reduce panel efficiency. Always verify that cleaning products are safe for photovoltaic applications.
Cleaning during peak sun hours creates multiple problems including rapid water evaporation and hot surface hazards. Water spots form quickly on hot panels, requiring additional cleaning time. Moreover, working on hot surfaces is uncomfortable and potentially dangerous. Plan cleaning sessions for cooler morning or evening hours instead.
Neglecting electrical safety represents another serious mistake during panel maintenance. Always disconnect the system before cleaning and avoid spraying water near electrical connections. Additionally, wet conditions increase shock risks when working around electrical equipment. Therefore, ensure panels and connections are completely dry before reconnecting the system.
When to Call Professionals
Some situations warrant professional cleaning services despite DIY capabilities. High installations, complex roof designs, or safety concerns make professional service worthwhile. Additionally, warranty requirements may specify professional maintenance for certain panel types. Review your warranty terms before attempting DIY cleaning on expensive equipment.
Persistent performance issues after cleaning may indicate deeper problems requiring professional diagnosis. Damaged panels, faulty connections, or inverter problems need expert attention. Similarly, any visible panel damage like cracks or discoloration should be professionally evaluated. Early professional intervention often prevents more expensive repairs later.
Professional services also make sense for large residential installations or commercial applications. The time and safety equipment required for extensive cleaning projects often exceeds DIY practicality. Moreover, professionals carry insurance coverage protecting against accidental damage during cleaning. Therefore, evaluate the cost-benefit ratio honestly for your specific situation.