Learning to avoid wiring mistakes is crucial when building your first solar system. Many DIY enthusiasts make preventable errors that reduce efficiency and create safety hazards. However, understanding these common pitfalls helps you build a reliable system from the start. Most wiring mistakes stem from rushing the installation or skipping basic electrical principles.
Understanding Solar Panel Wiring Mistakes
Solar panel wiring requires attention to detail and safety protocols. Consequently, beginners often overlook critical connections or use improper materials. These errors can damage expensive components or create fire hazards. Fortunately, most wiring mistakes are easy to prevent with proper planning.
Professional installers see the same errors repeatedly in DIY projects. Additionally, these mistakes often compound, creating multiple system issues. Understanding why these errors occur helps you avoid them entirely. Most importantly, taking time during installation prevents costly repairs later.
The Cost of Poor Wiring
Improper wiring reduces your system’s power output significantly. Furthermore, bad connections create heat that damages panels and inverters. Some wiring errors can void equipment warranties completely. Therefore, learning proper techniques saves money and ensures safety.
Mistake #1: Mixing Different Panel Types in Series
Combining panels with different voltages or amperages in series creates major problems. The weakest panel limits the entire string’s performance. Moreover, mismatched panels can cause dangerous hot spots and permanent damage. This mistake is especially common when expanding existing systems.
Many DIYers assume all panels work together seamlessly. However, even slight differences in specifications affect performance dramatically. Additionally, mixing old and new panels often creates compatibility issues. Your Personal Solar Load Map helps you plan consistent panel configurations from the start.
How to Fix Mixed Panel Issues
First, group identical panels together in each series string. Use separate charge controllers for different panel types when necessary. Furthermore, consider parallel wiring when mixing panel specifications. Always check voltage and current ratings before connecting any panels.
Document your panel specifications before starting any installation. Keep detailed records of model numbers and electrical characteristics. This information becomes invaluable when troubleshooting or expanding your system. Additionally, take photos of your wiring layout for future reference.
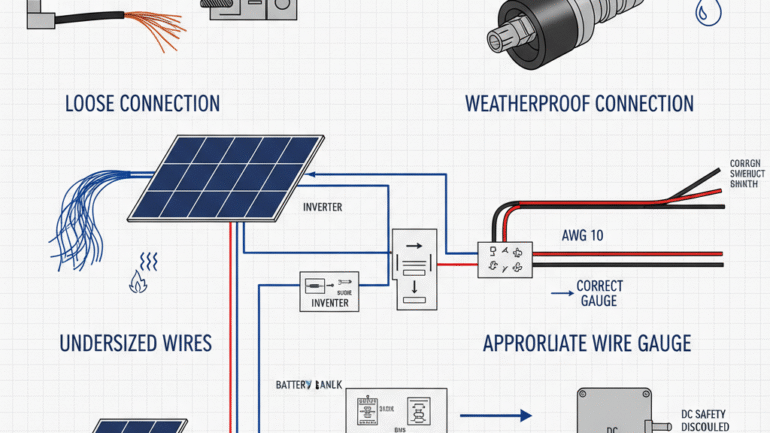
Mistake #2: Inadequate Wire Gauge Selection
Using undersized wires causes voltage drop and dangerous overheating. Many beginners choose wire gauge based on cost rather than safety requirements. Consequently, thin wires create resistance that wastes precious solar energy. This mistake becomes more critical with longer wire runs.
Wire gauge calculations must account for current load and distance. Additionally, consider temperature derating factors for hot environments like RV rooftops. Oversizing wire gauge provides safety margins and improves efficiency. Most importantly, never use household extension cords for permanent solar installations.
Calculating Proper Wire Gauge
Start by determining maximum current flow through each circuit. Then calculate voltage drop using wire length and resistance values. Furthermore, apply temperature correction factors for your installation environment. Choose the next larger wire gauge when calculations fall between standard sizes.
Online wire gauge calculators simplify these complex calculations significantly. However, understanding basic principles helps you verify calculator results. Always consult local electrical codes for minimum requirements. Remember that larger wire gauge numbers indicate smaller wire diameter.
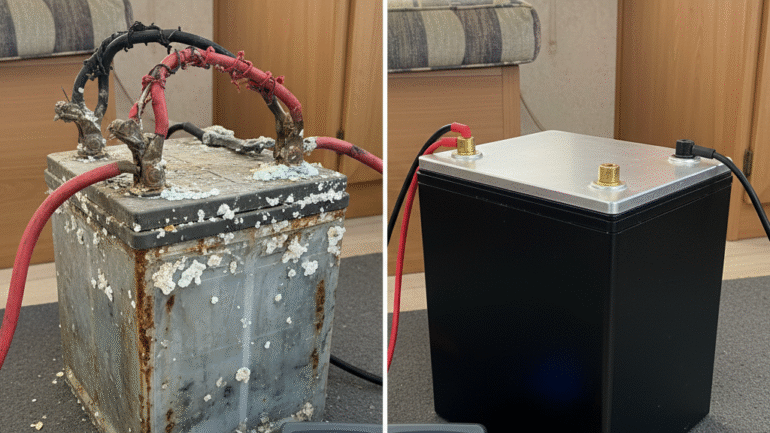
Mistake #3: Poor Connection Quality and Weatherproofing
Loose or corroded connections plague many DIY solar installations. These poor connections create heat, reduce efficiency, and pose fire risks. Moreover, moisture infiltration accelerates corrosion and system failure. Proper connection techniques and weatherproofing prevent these issues entirely.
Many beginners rush through connection steps to finish quickly. However, each connection point requires careful attention to detail. Use appropriate connectors designed specifically for solar applications. Additionally, apply dielectric grease to prevent corrosion in outdoor environments.
Creating Reliable Connections
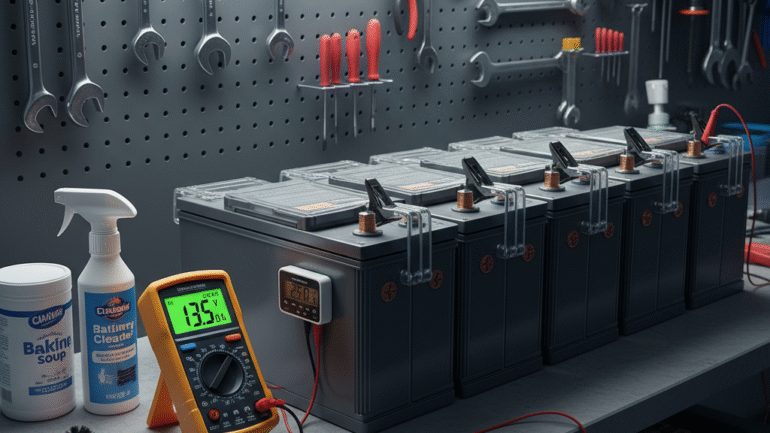
Strip wire insulation to exact lengths specified by connector manufacturers. Crimp connections with proper tools rather than pliers or generic crimpers. Furthermore, tug-test every connection before energizing your system. Loose connections often fail during thermal cycling or vibration.
Seal all outdoor connections with appropriate weatherproof materials. Use heat shrink tubing with adhesive lining for temporary moisture protection. However, proper electrical boxes provide the best long-term weatherproofing solution. Designer’s Guide to Clean Wiring shows professional weatherproofing techniques for small systems.
Mistake #4: Incorrect Grounding and Bonding
Improper grounding creates serious safety hazards and code violations. Many DIY installers skip grounding entirely or use inadequate methods. Consequently, unbonded systems pose electrocution and fire risks during faults. Proper grounding protects both people and equipment from dangerous voltages.
Equipment grounding differs from system grounding in important ways. Additionally, bonding requirements vary between grid-tied and off-grid installations. Understanding these distinctions ensures code compliance and safety. Always consult local electrical codes for specific grounding requirements.
Implementing Proper Grounding
Bond all metallic components including panel frames and mounting hardware. Use appropriately sized grounding conductors for your system voltage and current. Furthermore, install grounding electrode conductors to approved grounding electrodes. Never rely on plumbing or gas lines for electrical grounding.
Test ground fault protection devices regularly to ensure proper operation. Document your grounding system with detailed diagrams and photos. This documentation helps inspectors verify code compliance quickly. Moreover, future technicians can understand your grounding scheme easily.
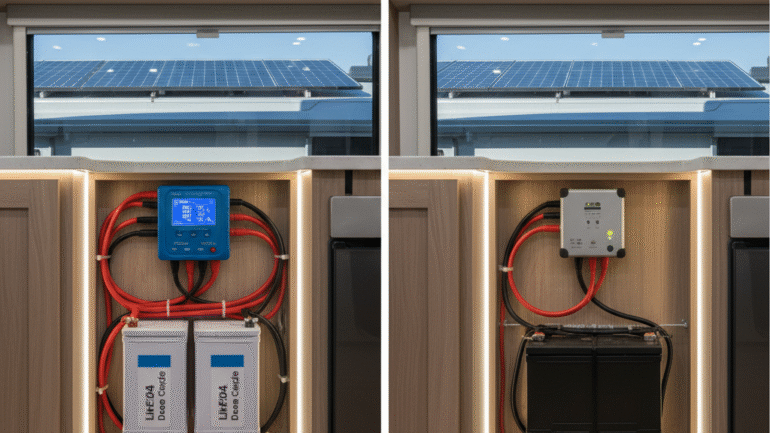
Mistake #5: Bypassing Safety Disconnects and Overcurrent Protection
Skipping safety disconnects and fuses creates extremely dangerous conditions. These protective devices prevent fires and allow safe maintenance access. However, many DIYers view them as unnecessary expenses or complications. Proper overcurrent protection is required by electrical codes nationwide.
Safety disconnects must be accessible and clearly labeled for emergency use. Additionally, overcurrent protection devices must match circuit requirements exactly. Oversized fuses or breakers won’t protect equipment during fault conditions. Never substitute inappropriate devices to save money or installation time.
Installing Essential Safety Equipment
Place DC disconnects within sight of inverters and charge controllers. Use appropriately rated fuses or breakers for each circuit’s maximum current. Furthermore, install AC disconnects near main electrical panels as required. Label all disconnects clearly with weatherproof tags or engraving.
Test all safety devices during installation and periodically thereafter. Replace any devices that don’t operate properly or show signs of damage. Keep spare fuses and breakers readily available for quick replacements. Additionally, train family members on emergency disconnect procedures.
Prevention Strategies and Best Practices
Planning your wiring layout before starting installation prevents most common mistakes. Draw detailed diagrams showing wire routes, connection points, and safety devices. Moreover, Solar Safety for DIYers provides comprehensive checklists for safe installations. Taking time during planning saves hours of troubleshooting later.
Invest in quality tools and materials from the beginning. Cheap connectors and inadequate tools cause more problems than they solve. Furthermore, quality materials last longer and perform better in harsh environments. Consider tools and materials as investments in your system’s reliability.
Building Skills Gradually
Start with small, simple projects to build your wiring skills progressively. Practice making connections on scrap materials before working on live systems. Additionally, take photos of your work to review and improve techniques. Each project builds confidence and competence for larger installations.
Join online communities and local groups focused on DIY solar projects. Experienced members often share valuable tips and troubleshooting advice. Furthermore, you can learn from others’ mistakes without repeating them yourself. Never hesitate to ask questions when uncertain about procedures.
When to Call for Professional Help
Some wiring mistakes require professional intervention to fix safely. Additionally, complex troubleshooting often exceeds beginner skill levels. Recognize when problems are beyond your current capabilities. Professional help costs less than replacing damaged equipment or rebuilding entire systems.
Electrical permits and inspections may be required in your area. Professional electricians understand local codes and inspection requirements thoroughly. Moreover, permitted work provides legal protection and insurance coverage benefits. Research your local requirements before beginning any electrical work.
Consider hiring professionals for initial consultations even on DIY projects. They can review your plans and identify potential problems early. Furthermore, professional guidance helps you avoid costly mistakes from the start. This upfront investment often pays for itself through prevented problems.