Outages can strike anywhere, even in the city. You may not have a full-home solar install, but you can still stay in control with a compact, DIY-friendly setup. This guide walks you through sizing a tiny solar system—typically one to two panels, a small battery bank, and a portable inverter—that keeps essential devices running during outages without overbuilding. It’s ideal for apartments, smallhomes, RVs, and anyone who wants a reliable, portable power source on a budget.
Why a Tiny Solar System for Urban Micro-Backups
Urban outages aren’t about powering an entire home; they’re about keeping a few critical devices online. A compact solar system offers:
- Resilience for essential devices: phone charging, lighting, Wi‑Fi, small fans, and a mini fridge or portable freezer.
- Low footprint and quick setup: no roof work, no permittings, just a couple of panels on a balcony or window sill and a portable inverter.
- Mobility: take it on the road for RVing or camping, or store it away when not needed.
- Cost efficiency: smaller batteries and panels mean lower upfront costs and simpler maintenance.
For many folks, the goal isn’t a home-wide blackout system but a dependable pocket of power that keeps the lights on and the essentials running while the grid recovers. Let’s translate that goal into a practical, DIY-friendly design.
Sizing Your Compact System
The core idea is simple: estimate your daily energy needs, decide how many sun hours you can rely on, and then pick a panel/battery/output combo that covers those numbers with a sensible margin for inefficiencies and aging. Here’s a practical way to approach it.
- List essential devices and their typical power use (in watts) and hours per day. Common items include LED lighting, a phone charger, a Wi‑Fi router, a small fan, and a compact 12V fridge or mini cooler.
- Convert each item to watt-hours per day (Wh/day). For example, a 6W LED lit for 6 hours = 36 Wh; a 10W router running 24 hours = 240 Wh.
- Sum the Wh/day for all essentials. Add ~20–30% as a buffer for surge watts, inverter losses, and battery aging.
- Choose a battery capacity that comfortably covers your daily Wh plus the buffer. A common starting point is a 100–200 Ah, 12V LiFePO4 or AGM bank (about 1,200–2,400 Wh) for a moderate load.
- Select panel capacity to meet the daily Wh target in your available sun hours. A rough rule: Watt-hours per day achievable ≈ panel wattage × peak sun hours. With 4–5 sun hours, a 120–150W panel can yield roughly 480–750 Wh/day.
Worked example (typical urban micro-backup load):
- Two LED lights, 6W each, for 6 hours: 72 Wh
- Phone charger, 10W for 3 hours: 30 Wh
- Wi‑Fi router, 9W for 24 hours: 216 Wh
- Mini fridge, 40W for 8 hours: 320 Wh
Total ≈ 638 Wh/day. Add a 25% buffer → ~800 Wh/day. If you have ~4.5 hours of peak sun, a 180–200W panel can meet this, paired with a 100–150Ah 12V battery. If you expect longer outages or more devices, scale up accordingly.
Core Components You’ll Use
Panels
Panels are the source of energy. For a compact setup, you have options like:
- One 100–150W panel: simple, compact, easy to mount on a balcony or window frame. Suitable for light-duty scenarios and quick recharges between outages.
- Two smaller panels (60–100W each): more versatile, improves daily energy harvest in partially shaded urban spaces, and provides a bit more headroom for longer outages.
When selecting a panel, prefer monocrystalline for higher efficiency in compact spaces, and ensure it ships with MC4 connectors for easy wiring. Keep in mind that in real-world conditions, wind, snow, or shade can reduce output; plan with a safety margin.
Battery and Inverter
Your battery bank stores energy for use when the sun isn’t shining. For DIY micro-backups, LiFePO4 (lithium iron phosphate) is a popular choice due to its long life, better safety profile, and lighter weight than lead-acid. A common starter setup is a 12V system with a LiFePO4 battery bank in the 100–200Ah range, paired with a 600W or higher pure sine wave inverter. Why LiFePO4? More cycles (over 2,000 in many cases), stable voltage, and a built‑in Battery Management System (BMS) that protects cells from overcharge, overdischarge, and overcurrent.
Inverters convert the DC energy from your battery into AC power for devices like laptops and small coffee makers. A pure sine wave inverter is recommended because it safely runs sensitive electronics and appliances. For most urban micro-backups, a 300–600W continuous-rated pure sine wave inverter provides ample headroom for daily needs and occasional surges.
Charge controllers—MPPT (maximum power point tracking) is worth the investment when you’re maximizing harvest from a higher-watt panel or when you’re wiring the system with longer cable runs. MPPT controllers are more efficient, especially in cool mornings or partially shaded setups, and they help you extract the most energy from every sun hour.
Setup, Wiring, and Safety
Safety is the most important part of any DIY solar build. Here are practical guidelines to keep your system safe and reliable.
- Plan a ventilated battery area: LiFePO4 cells generate heat during rapid charging or discharging, so provide airflow and keep the battery away from confined spaces and direct sunlight.
- Fuse protectively: install a DC fuse close to the battery on the positive line (e.g., 15–30A for small systems, higher for larger banks). This protects wiring and equipment from short circuits.
- Use correctly sized wiring: for runs up to about 6–8 feet, use 6–8 AWG for panel-to-controller and controller-to-battery connections; longer runs may require thicker gauge to minimize voltage drop.
- Keep the AC side minimal but safe: use a grounded, enclosed, GFCI-protected outlet strip or a small-inverter-compatible extension cord to power devices in a controlled way. Avoid running high-load appliances that exceed inverter capacity.
- Secure the setup: fasten panels securely, avoid topple-prone arrangements, and place the battery on a non-conductive stand or in a vented box to prevent moisture buildup and accidental contact.
Real-World Scenarios and Everyday Use
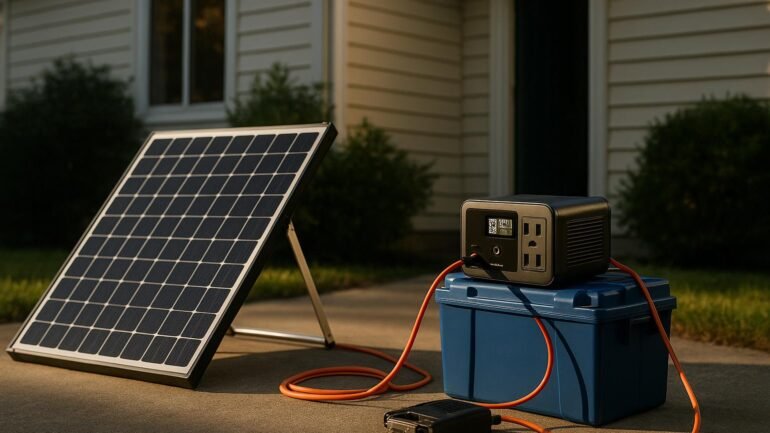
How would this look on a typical day? Suppose you’re in an apartment with a balcony and you’ve installed a 150–200W panel setup, a LiFePO4 100Ah battery, and a 600W pure sine inverter. When the grid goes down, you can:
- Charge your phone and laptop via USB or 110/120V outlets supplied by the inverter (while keeping to their surge ratings).
- Keep a couple of LED lights on, so you can move around safely at night without burning through battery juice.
- Maintain essential Wi‑Fi connectivity for a few days by managing usage; you’ll likely cycle the fridge or use it in short bursts to preserve energy if you’re relying on the system for longer outages.
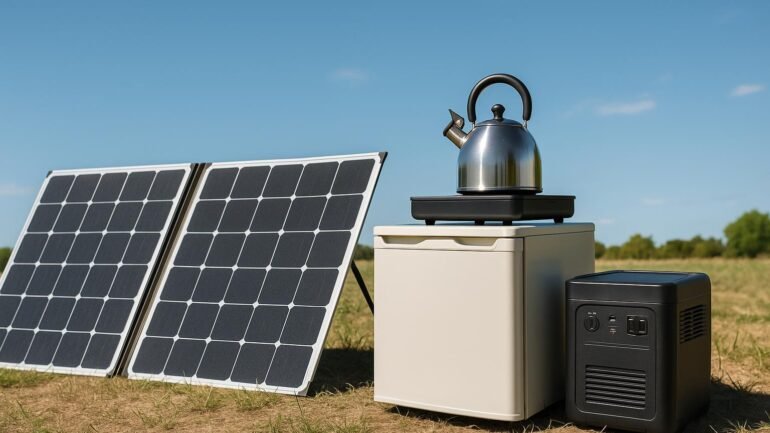
RV owners or campers, too, can benefit from a similar setup. A compact system can run a small fridge, charge devices, and power a compact kettle or coffee maker for short periods. The key is to size for your priority loads and keep expectations aligned with the available sun hours and battery capacity.
The example above isn’t a full-home solar system, but it’s a practical approach that minimizes complexity while delivering meaningful resilience. If you plan to power larger appliances (like a 700–1,000W fridge, tools, or air conditioning), you’ll want a larger panel array, a bigger battery bank, and more robust protective enclosures and safety practices.
Key Takeaways:
- Estimate daily energy use with a realistic buffer to account for inefficiencies and battery aging.
- MPPT controllers improve energy harvest, especially with multiple panels or shade.
- LiFePO4 batteries offer longer life, safer operation, and better packing in small spaces for DIY builds.
- Keep safety first with proper fusing, ventilation, and secure mounting for all components.
- Design with future upgrades in mind: you can start small now and scale later as needs change.