Winter-Proofing a Starter Solar System: Why Winter Matters
Winter creates unique challenges for a beginner-friendly solar setup. Shorter days, lower sun angles, and freezing temperatures can curb output just when you need power most. Snow and ice can blanket panels, and cold reduces battery performance. This practical, seven-step checklist helps you keep a starter solar system running reliably—without overspending. The goal: a truly winter-proof solar system that stays safe, efficient, and valuable all season long.
7-Step Winter Prep Checklist
Step 1 – Inspect and Clean Your Panels
Clear, clean panels are the first line of defense against winter performance drops. Start with a quick visual check of mounting hardware and surface condition.
- Look for loose bolts, cracked glass, or corrosion on brackets and rails.
- Remove loose snow and ice with a plastic scoop or soft brush. Avoid metal tools that can scratch glass.
- Wipe away dust, pollen, and droppings that can dull efficiency, especially when daylight is limited.
- Check for shadows from overhanging branches or nearby structures that can be more pronounced in winter.
- Ensure surfaces stay free of obstructions after cleaning and re-check mounting angles if you notice new shade.
Addressing small issues now helps keep a steady light-to-battery flow during cold snaps.
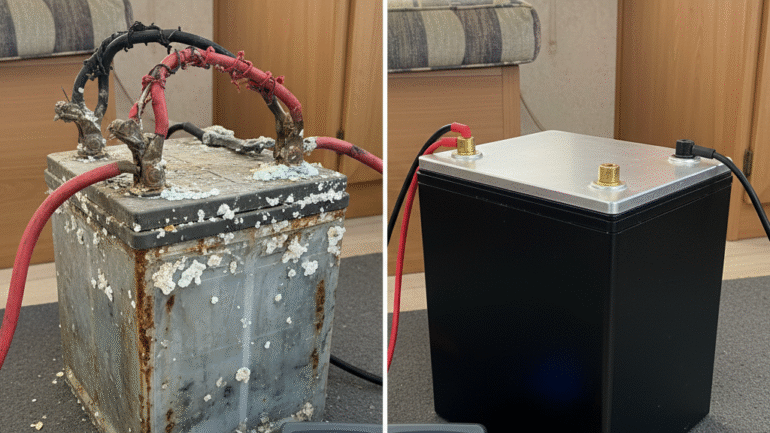
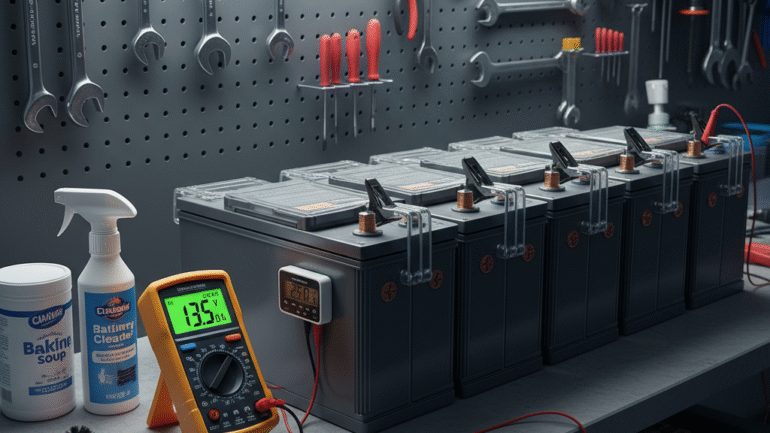
Step 2 – Check Battery Health and Temperature Management
Batteries bear most of the load in cold weather. Cold slows chemical reactions and reduces usable capacity, so proactive care matters.
- Test resting voltages and state of charge. When possible, keep lead-acid batteries above ~50% SOC to reduce sulfation; avoid deep discharges with any chemistry.
- Know your battery type. Lithium chemistries tolerate cold better but still lose capacity; ensure proper charging behavior in cold temps.
- Consider insulation or a purpose-built enclosure to maintain warmth without overheating. If you use a heater, follow manufacturer guidelines and provide ventilation.
- Place the bank in a sheltered, dry location. If outdoors, seal connections and use weatherproof enclosures.
- Inspect vent caps (if vented) and electrolyte levels on applicable batteries. Tighten terminals and clean corrosion-prone surfaces with a baking-soda solution, then dry thoroughly.
Prioritizing cold-weather battery care keeps the backbone of your winter-proof solar system strong as temperatures fall.
Step 3 – Inspect Wiring, Connectors, and Insulation
Cold, moisture, and temperature swings can reveal weak links. A solid wiring plan minimizes losses and protects you and your equipment.
- Inspect DC connections at the charge controller, battery, and inverter. Tighten where needed and apply corrosion-preventive paste.
- Verify gauges and outdoor-rated conduit routing. Shorter runs with heavier gauge wire reduce losses in low-sun days.
- Check fuses, breakers, and circuit protection. Cold can cause metals to contract; ensure clean contacts and no arcing.
- Seal outdoor terminations and weatherproof exposed joints. Use silicone sealant or weatherproof boxes where appropriate.
- Keep cables away from heat sources and sharp edges. Use conduit and clamps to prevent movement during freeze-thaw cycles.
A reliable wiring setup minimizes voltage drops and keeps the system functional when sun is scarce.
Step 4 – Use Proper Mounting and Snow Removal Practices
Panel angle and snow management influence winter harvest. Small adjustments can boost output without sacrificing performance.
- Consider a modest tilt to help snow slide off naturally. In many latitudes, 10–30 degrees improves shedding with acceptable summer trade-offs.
- For rooftops, use a roof rake with a soft edge to clear snow without stepping on panels. Avoid climbing on panels, which can damage them and void warranties.
- Monitor heavy snowfall and ice build-up. If snow lingers, plan a safe removal routine or wait for a warm spell.
- Remove new shade from snow banks, parked vehicles, or nearby structures to maximize daylight capture.
Smart mounting and careful snow management help keep panels productive through blizzards and cold snaps.
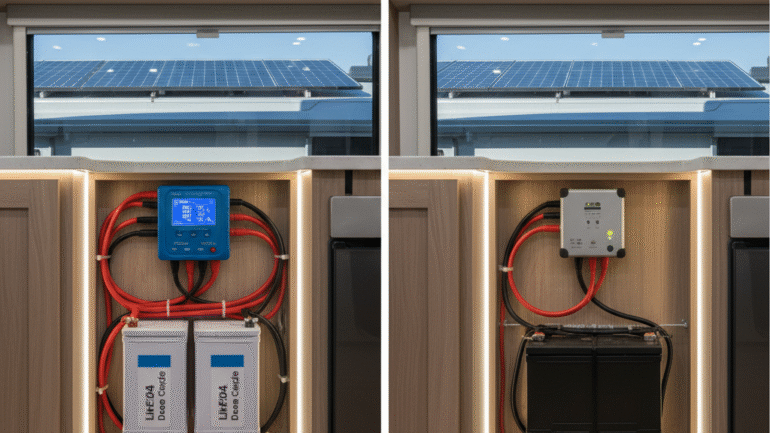
Step 5 – Maximize Charging in Shorter Days
Winter daylight is brief and the sun sits lower. Your aim is to harvest every watt while protecting battery health.
- Use an MPPT charge controller when possible. MPPTs optimize energy harvest in low irradiance and cold conditions.
- Enable winter-appropriate charging profiles if your controller supports temperature compensation or presets.
- Monitor SOC and daily energy use. Align loads to expected solar intake and keep batteries in a safe range.
- Consider a modest supplemental charging option for very short days. A small portable panel or charger can help, if compatible with your system.
- Practice energy efficiency: switch to LED lighting, lower-draw devices, and smart power strips to reduce daytime drain.
With careful management, even shorter winter days can keep your starter system productive and resilient.
Step 6 – Safety Protocols for Winter Work
Winter adds hazards—slippery surfaces, ice, and cold equipment. Prioritize safety so maintenance goes smoothly.
- Never work alone on roofs or elevated surfaces. Have a partner nearby and keep a charged phone at hand.
- Dress in layers and wear insulated, slip-resistant footwear. Use gloves that balance warmth with dexterity.
- Disconnect the solar array and isolate DC circuits before maintenance. Use lockout procedures and verify energization is off.
- Use insulated tools and avoid handling live conductors with wet hands. Keep tools dry and stored when not in use.
- Be mindful of ice, snow, and wind chill. Plan ahead and take breaks to stay warm and alert.
Clear safety practices protect you and your equipment as you build a more winter-proof system.
Step 7 – Budget-Friendly Upgrades for Winter Performance
You don’t need a full overhaul to gain noticeable winter benefits. Targeted, budget-friendly upgrades can boost reliability without overspending.
- Battery insulation and enclosure: Add simple insulation to the bank to reduce cold starts and stabilize performance.
- Battery maintainer or smart charger: A low-cost maintainer helps keep batteries at optimal state of charge during long winter nights.
- Cold-weather rated components: When replacements are due, choose outdoor-winter-rated panels, cables, and controllers to minimize wear and voltage drop.
- Upgraded charge controller: If you’re on PWM, consider MPPT for better energy harvest in low-light/low-temp conditions.
- Better cabling and sealing: Replace aging cables with outdoor-rated, UV-resistant options; add weatherproof conduit to protect from moisture and ice.
- Temporary heat for critical banks: For some setups, a small insulation wrap or heater pad can help maintain battery temperature (follow safety guidelines).
- Energy-smart habits: Use timers or smart switches to run loads during daylight and maximize recoverable energy.
These budget-friendly upgrades help you keep a robust winter-proof solar system through the cold season.
Troubleshooting common winter performance issues
Reduced daytime output – quick fixes and checks
- Reassess orientation and exposure; confirm no new shading from snow banks or structures.
- Check battery SOC, charging status, and verify charge controller settings for cold weather.
- Inspect wiring and connections for corrosion or loose terms; ensure proper fusing and protection.
- Ensure MPPT is actively tracking; verify panel temps and ambient conditions do not exceed controller limits.
When to seek professional help
- Persistent low output after checks, signs of overheating, or unusual smells from battery enclosure.
- Uncertain wiring or electrical work beyond basic maintenance.
- Any doubt about safety or code compliance in outdoor installations.